Showing posts with label seafood. Show all posts

Friday, May 16

A Pineapple Chutney that June Cleaver Would be Proud Of

I've never been one for canning, jarring, or preserving. So when Pixie and Rosie announced their Putting Up Event, I thought, Yes! Now I have a reason to make homemade jam.

I immediately began jotting down essentials I would need, like gelatin and old-fashioned Ball glass jars. I had visions of myself in a 1950's full-skirted dress, spotless white linen half apron, and pearl necklace and heels. I was going to be sooo June Cleaver.

june cleaver

Then I double checked the event and saw that they would accept chutney as well, which doesn't need gelatin, special jars, heels, or pearls to make properly. So I made this simple savory chutney instead.

Chutneys are sweet and spicy condiments, which are remarkably versatile. Thanks to dear Deeba, I now know chutney derives from the East Indian word chatni, which is Hindi for "to crush." That's because chutneys are often made by crushing the ingredients together with a stone.

I like sweet and sour chutneys, which often get their sweetness from fruit and sugar and their sourness from vinegar.
Ingredients are simply mixed together and simmered slowly until the sugar bubbles up and thickens, creating a jam-like sauce. They're generally cooled before being eaten and can last for at least a couple of weeks in the refrigerator.

My two favorite chutneys are this mouth-puckeringly tangy kumquat and dried cherry chutney that I made several times this past winter, and today's fresh pineapple chutney. I know I'd also like Deeba's delicious spicy coriander-mint chutney.

Sweet pineapple and raisins balance the sour vinegar, hot chili, and fragrant spices of this aromatic and bold chutney. It's especially tasty with grilled shrimp but also pairs well with tofu and pork; or you could just enjoy it with some freshly baked Naan or warm pitas.

Now if only I could find my silk sari ....
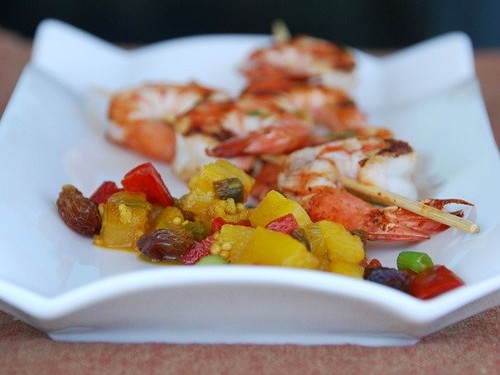
pineapple chutney skewers

Grilled Shrimp Skewers with Fresh Pineapple Chutney

Yields approximately 1 1/2 cups
Makes 4 entree or 8 appetizer servings
Print recipe only here.

Marinade:

24 extra large or jumbo shrimp, cleaned and deveined
1 tablespoon sesame oil
3 tablespoons low-sodium soy sauce
juice of 1/2 lime
1/2 teaspoon cumin
1/2 teaspoon cayenne pepper

Chutney:
1 teaspoon canola oil
2 green onions, thinly sliced (about 1/4 cup)
1 red bell pepper, diced (about 1 cup)
1 serrano chili, minced with some seeds
2 cups fresh pineapple, diced
1/4 cup golden raisins
3 tablespoons apple cider vinegar
1/2 cup white sugar
1/2 cup brown sugar
1/2 cup orange juice
1 1/2 tablespoons fresh ginger, minced
1/2 teaspoon ground coriander
1/2 teaspoon mustard seeds
1/4 teaspoon ground cinnamon
salt, to taste
1 tablespoon fresh cilantro, finely chopped

To make the marinade, whisk all ingredients in a bowl. Pour into either a large Ziploc bag or a plastic container. Add the shrimp, shaking well. Refrigerate for at least 30 minutes or up to 1 hour.

To make the chutney, mix all ingredients from apple cider vinegar through ground cinnamon in a small bowl and set aside. Heat canola oil in a medium pot over medium-high heat. Saute green onions and red peppers for 3 minutes, or until slightly softened. Add chili, pineapple, and raisins, cooking for an additional 2-3 minutes. Add the vinegar mixture to the pot; bring to a boil. Reduce heat to medium-low; simmer uncovered, until thick and reduced, about 35-45 minutes. Once cooked, stir in fresh cilantro, and season with salt, to taste. Allow to cool before serving. (This chutney will keep for up to 2 weeks if refrigerated in an airtight container.)

Remove the shrimp from the marinade; place 3 shrimp per skewer. Grill for 2 minutes, flipping once, or until the meat is opaque and the outside is lightly charred.

You might also like:

Lamb Kebabs with Minted Cucumber Chutney


Shrimp Tacos with Citrus-Avocado Salsa


Goat Cheese and Poblano Quesadillas with Pineapple-Mango-Habanero Salsa


Save This Page on Del.icio.us

Thursday, February 28

Kona Kampachi with Meyer Lemon-Thyme Butter

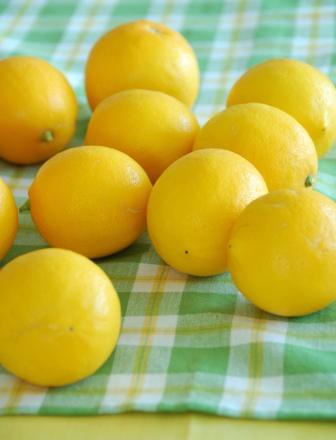
Meyer Lemons

When we were kids I used to drive my brothers nuts singing the "Lemon Tree" song over and over again.

Lemon tree very pretty and the lemon flower is sweet
But the fruit of the poor lemon is impossible to eat.

Well not if it's a Meyer lemon. With their sweet-tart tang, they're bold enough to make you pucker slightly but sweet enough to eat a slice raw. That's because a Meyer lemon is a citrus hybrid -- a cross between a regular lemon and a sweet orange or a mandarin -- making it less acidic and much sweeter than regular lemons.

Meyer lemons are rotund and have a soft, thin rind that almost glows golden orange when fully ripe. Their flavor is quite complex with brush strokes of bright lemon, shades of tangy lime, and hints of sweet orange.

I buy my Meyer lemons at local farmers' markets, but fortunately most supermarkets carry them seasonally from December-April. Now's the time to buy them while they're at their peak.

Then cook them with some exceptionally flavorful Kona Kampachi,® a sushi-grade Hawaiian yellowtail that is sustainably raised off the coast of Hawaii. Since it has no detectable levels of mercury and has high levels of Omega-3 fatty acids -- which have been linked to a reduced risk for cardiovascular disease -- Kona Kampachi is also healthy for you.

If you can't get to Hawaii to eat some Kona Kampachi, then consider buying some online from Kona Blue. I received my thick, snowy white, incredibly fresh fish fillets courtesy of Hannah.

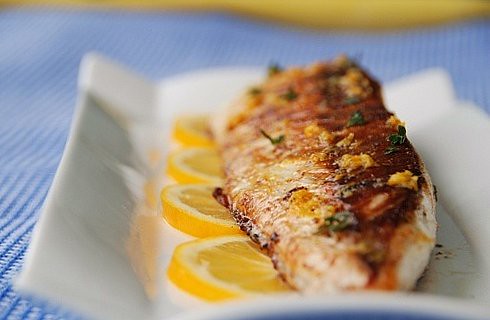
Though it can be eaten raw, I quickly pan seared the fillets, which because of their high fat content, rendered the fish crispy on the outside and moist and flaky on the inside. Everyone knows that fish and citrus are beautiful together, but eating this succulent Kona Kampachi with browned, buttery Meyer lemons elevated this weeknight dinner to something truly special.

That's why I'm sending my Kona Kampachi with yellow Meyer lemons to Zorra of the beautiful Kochtopf for her International Women's Day event. Celebrate the economic, political and social achievements of women this year on March 8th by sending Zorra your yellow food submissions.

I still find myself singing the "Lemon Tree" song when I'm cooking with Meyer lemons, but since my brothers are in RI, now I drive only Jeff nuts.

Kona Kampachi with Meyer Lemon

Kona Kampachi with Meyer Lemon-Thyme Butter
Serves 2
Print recipe only here.

1 1/2 tablespoons butter
the flesh of 1/2 de-seeded Meyer lemon, minced until pulpy
1 teaspoon Meyer lemon zest
1 teaspoon orange zest
1 teaspoon fresh minced ginger
1 sprig of fresh thyme
salt and freshly ground black pepper, to taste

8 ounces Kona Kampachi fillets
2 teaspoons butter
2 teaspoons olive oil

1 Meyer lemon, thinly sliced
1/2 teaspoon butter or olive oil

Combine all ingredients for the citrus butter in a small bowl and mix with your fingertips, ensuring that the fruit and seasonings are incorporated into the butter. Set aside.

For the fish, melt butter with olive oil in a large skillet over medium-high heat. Rub fish fillets on both sides with half of the citrus butter and place in the hot skillet. Cook fillets for 3-4 minutes, then flip once and cook an additional 2-3 minutes, or until opaque and slightly browned. If you'd like the fish more rare, then reduce the cooking time by half.

Meanwhile, melt 1/2 teaspoon of butter in a medium sized skillet over medium heat. Add a whole sliced Meyer lemon, and cook for about 1-2 minutes, flip once, and cook an additional 1 minute, or until lightly browned.

Melt remaining half of the citrus butter in the microwave or on the stove top and drizzle on top of the cooked fish before serving. Garnish with additional fresh thyme, if desired.

P.S. This morning I saw Jaime's comment mentioning Elly's (of elly says opa!) Eat to the Beat event. Elly's looking for your music-related recipes (by March 2nd), and this one seems just right, especially since I can't get the darned lyrics out of my head.

You might also like:

Save This Page on Del.icio.us

Tuesday, July 31

Summer is Time for Salsa and a New Handbag

There aren’t too women I’ve met who don’t love handbags (and shoes, but that’s another post). Recently, I was in Nordstrom when I overheard two women (an attractive blonde and an attractive brunette) justifying the purchase of a bag that was almost identical to the one on the brunette's shoulder.

“Yeah, but yours is more of a mocha color," the blonde explained. "Look -- and she held the bags next to each other-- this is definitely more chocolate than mocha. You have to get it." (See, there is a connection to food already.)

The brunette walked over to an available cashier and purchased her chocolate colored bag. I was astonished. Do women love handbags that much? Then I looked around me: half of the female population of Southern California were in Nordstrom that day, and fully half of them were in line holding new handbags.

Given that most women have inherited the autosomal dominant "handbag gene," it didn't surprise me to learn that even a reusable grocery bag could generate a stir. In case you missed it, Anya Hinmarch, a posh London designer, whose handbags go for hundreds and even thousands of dollars, created an eco-friendly tote bag imprinted with the words, "I'm Not A Plastic Bag." It was designed as a fashionable way to encourage people to stop using biodegradable-resistant plastic bags. It has been selling wildly all over the world, including here in the U.S. at Whole Foods. Women here were so eager to get one of these coveted bags that they waited in line for hours. That’s nothing, however, compared to what happened in Taiwan: In a frenzy to obtain one of these bags, a stampede resulted in 30 people actually being sent to the hospital.

Though I don’t think you should trample the woman in front of you to get one, I do think a reusable tote bag is an easy way to help the environment. Since the lovely Meeta of What’s For Lunch, Honey? has asked us to share some habits that help protect the earth for this month’s mingle, I’ve decided to submit this post. Though it’s a small thing, using a canvas tote bag can make a big difference. For more about the benefits of reusable bags and for tips click here. Also, Cate of Sweetnicks and Well Fed fame likes the tote bags from reusablebags.com which are made from recycled ad banners and seatbelt straps.


Any reusable bag will do, like this nifty one from my dad, who thought I'd like it for my farmers' market trips. I do; my only problem is I can't find the right heels to go with it. Maybe I'll head back to Nordy's....


This no-cook summertime salsa is a fresh, easy way to incorporate many of your farmers' market finds. Thanks for sharing Blush, the tomato, Alanna! With juicy cantaloupe, crunchy corn, and fiery jalapenos, it's a vibrant and flavorful medley of summer's finest fruits and veggies. Served atop grilled seafood or tofu and a cooked whole grain, such as quinoa (OK, this part requires some cooking, though very little), it makes a lovely summertime meal.

Susan’s Summertime Salsa


Print recipe only here.

1 cup diced cantaloupe
1 cup diced mango
1 cup diced red or yellow bell pepper
½ cup red or yellow cherry tomatoes
½ cup chopped cucumber (peeled and de-seeded)
1 ear of fresh sweet corn (cut from cob)
¼ cup diced red onion or scallions

2 Tbsp fresh lime juice (about one small lime)
Pinch of lime zest
1 Tbsp fruity olive oil
2 tsp fresh grated ginger (about a 1-inch sized piece)
2 Tbsp minced jalapeno, with or without seeds
Salt
2 Tbsp each chopped fresh cilantro, mint, and basil

Combine the first 7 ingredients in a bowl, and toss gently to blend.

Combine the lime juice through the salt in a small bowl; whisk until fully blended. Pour on top of the fruit mixture. Serve either at room temperature or chilled. Stir in the chopped fresh herbs just before eating so they don’t turn brown.

Note:

Fresh sweet corn on the cob can be eaten raw, which is delicious and crunchy. If you've never tried it before, then give it a go. You'll be glad you did.


If you don’t like the intensity of raw onions, simply pour some boiling water over them to remove their pungency, or sauté in a bit of olive oil.


You might also like:

Minding My Peas
Swordfish with Pineapple-Mango Salsa
Funky farmers' market produce


Save This Page on Del.icio.us

Thursday, July 5

Lobster So Big, You Could Put a Saddle On It and Ride It (video)

In my family, everyone loves lobster.

I mean just look at my dad and my husband: who's more ecstatic?


It all started one glorious summer Sunday afternoon many years ago when Jeff and I were dating. We took a ride with my parents to Galilee, in Rhode Island, where local fishermen were selling freshly caught lobsters. My dad (in a typical moment of generosity) offered to buy a couple; he’s had Jeff eating out of the palm of his hand ever since.

Jeff and I recently took a red-eye to Rhode Island for an impromptu visit. Since the New England lobster season starts in April-May, we timed it perfectly.

One afternoon we took a ride to fabulous Newport and discovered a fish market that was selling lobsters. Not just any lobsters. 10, 12, even 14 pound lobsters! My dad picked up a 14-pounder and exclaimed, "this one's so big you could put a saddle on it and ride it.”

Fearing that a 14-pounder's meat might not be tender enough, we asked the fisherman’s advice. This guy couldn't have been cast better if he were in a movie about RI: Red Sox cap-wearing, Right-out-of-the-Soprano's-massive guy with huge hands, which were clearly accustomed to scooping up lobsters.


He also had a wicked sense of humor, and in-between wise cracks, assured us that meat from larger lobsters can be tender. The key is in the cooking. "Whateva youz do, DON'T overcook it. Otherwise, youz'll be back here tomorra complainin that these were no good," he warned us.

Most people agree that the smaller the lobster, the more tender the meat. Yet, the very thought of feasting on an 8 or 12 or 14 pound lobster easily seduced my dad. He settled on two: an 8 3/4 pounder and a 9 1/2 pounder (which is the one he's holding), mostly because of logistics -- we simply didn't have a pot big enough for a 14 pound lobster.

As he went to pay the lobster guy, words were exchanged, and then suddenly, my dad turned and left. We all panicked. Oh, no! Did dad offend the lobster guy? "No lobster for you!"


Thankfully, no. My father explained, the guy told him, “Come back in an hour or so. Something tells me the prices might go down.” An hour later, we returned, and as he said, the prices went down.

My dad left the market holding his lobsters like a proud father of twins coming home from the hospital. I think this was the beginning of a beautiful friendship between Dad and the lobster guy.

There are myriad ways to cook lobster, including boiling, baking, grilling, and poaching in vanilla, which seems to be de rigeur on this season’s Top Chef, doesn't it? We opted for grilled lobster, which was a hit with everybody.

So how do you grill a lobster? As most chefs and grilling experts suggest, we boiled the lobster first. The amount of water and cooking time will vary depending on the size of the lobster you use. Just be sure that you have a BIG POT.


To kill the lobster, hold a butcher knife over its head, about an inch behind its eyes (as shown below) and puncture and slice forward in one motion.


Drop the entire lobster into boiling unsalted water. Most recipes suggest boiling until the shell turns red, about 5 minutes for a 1 ½ pound lobster. We cooked ours about 20-25 minutes because of their large size. Just note that the lobster should not be completely cooked at this point; it willl finish cooking on the grill. After you remove the lobster, let it cool slightly before continuing.


In order to save my mom's kitchen, we took our boiled lobster outdoors, where my dad proceeded to slice them in half, lengthwise, and to crack the shells in order for the meat to get exposed to the grill’s flames. This was no easy task. Check out this short film of a 200-pound-guy-with-a-hammer whaling on a lobsta that just wouldn't crack.


Now, that it is open, you can brush the meat and the inside of the lobster with melted butter.

Place the lobster flesh side down on a pre-heated grill, and cook until the meat forms some grill marks and begins to turn opaque, about 4-6 minutes for a 1 ½ pounder. Ours took about 8-10 minutes.

Baste them with melted butter, as Jeff's mom, Dorothy, is doing, to help seal in the moisture and make the meat succulent.

Flip the lobsters over and cook for the same amount of time that you did on the first side. Be careful to not drip too much butter directly onto the grill or large flames will leap up at you. (Who needs eyebrows anyway?) Thank goodness my husband's a dermatologist. Oh wait, he tells me dermatologists don't do burns; however, if the medication used to treat the seared eyebrows causes some kind of rash, then he could help us.

The lobster is done when the shell turns a deep red, and the meat is opaque. Check the meat at the thickest part of the tail to make sure it's fully cooked. Remove the meat from the shells, and serve with your desired accompaniments.

Everyone at our house savored the smoky flavor of the grilled lobster and enjoyed it with simple melted butter and lemon or with my mom’s famous tartar made from horseradish, ketchup, mayo, lemon juice, and Tabasco.

According to everyone who ate the grilled lobsters (in a state of buttery drenched delirium) that evening, their concerns were allayed; the meat was perfect.

*Print recipe only here.

*For a simple how to grill lobster guide, check out this article from about.com.

*I also just discovered a delicious recipe for Grilled Lobster and Potatoes with Basil Vinaigrette on epicurious.com that was featured the June 2007 issue of Gourmet.

*Finally, thanks to my new friend Mark from New Hampshire who sent me a link to this interesting article from The Boston Globe. It's about "colossal crustaceans" and corroborates my story!

Come'on over. Food Blogga will be hosting Weekend Herb Blogging next week (July 9-15).


Save This Page on Del.icio.us


You might also like:
Painful polenta
What threat? I made you a Ricotta pie.

Waffles, Coffee, and Lentil Soup
Bring back Sunday dinner

Monday, May 7

You Can Make a Lot of Salsa with a Case of Mangoes

If you’re familiar with my blog, then you know I love farmers’ markets. A week without a trip to the farmers' market is like a week without the sun: it makes me grumpy. I can’t remember the last time I bought produce in a regular grocery store. Sure, I go to the supermarket for eggs, milk, and cereal, but fruits and vegetables come from the farmers. So, what I did other day, shocked me. I tell myself it a was just a transgression.

I was at Costco stocking up on bottled water, protein powder, and toilet paper (why two people need 36 rolls of Northern toilet tissue, I’ll never know). On my way to the protein powder, I passed pineapples, tall, fragrant, ripe pineapples each topped with a crown fit for a king. They had no brown spots, no fuzzy fur on the bottoms—they were perfect. Better yet, they were only $2.99 each. I couldn’t believe it! I put two in my carriage and buried them under the toilet paper.

Not 20 feet later on my way to the water, I passed a mountain of mangoes, whose green and yellow skins were taut and unblemished. Having just paid $1.75 each for some (which weren’t even good), I stopped to check the price -- $8 for a whole case! I debated whether or not to buy them. What would we do with a whole case of mangoes? Would they be sweet? What if they all ripened at the same time? Then I heard my father’s voice in my head saying, “Buy them! They won’t go to waste." “But Dad, it’s only the two of us.” “Just buy them!” the voice echoed. After scanning left and right, I picked up a case and placed it in the carriage. What did I think? That the Farm Bureau was watching me on the surveillance camera? Feeling guilty, I wondered if the toilet paper could cover these too.

When Jeff came home from work that night, he saw the behemoth bowl of mangoes and pineapples on the counter and asked, "Costco?" "Costco," I replied.

That night we enjoyed a pineapple-mango salsa on swordfish for Jeff and tofu for me. Fruit salsas are a staple in our house because they're light, healthy, and versatile. This salsa is sweet, spicy, and tangy and tastes even better when allowed to rest at room temperature before serving. Also, the rich golden yellow of both fruits seemed just right to submit to Barbara's A Taste of Yellow event at the famed Winos and Foodies. In addition to raising awareness of cancer, Barbara's event has been approved by the Lance Armstrong Foundation as an official LIVESTRONG Day Event.

Swordfish with Pineapple-Mango Salsa
Print recipe only here.

1 cup fresh pineapple, diced
¾ cup mango, diced
1 small red or green chile, finely diced
3 Tbsp green onions, finely sliced
Juice of ½ lime
1 Tbsp fresh mint, finely chopped
1 Tbsp fresh cilantro, finely chopped
Salt, to taste

2 (4-oz) swordfish steaks or mahi-mahi
1 tsp olive oil
Salt and pepper

For the salsa, simply place all ingredients in a bowl; allow to rest for at least 45 min- 1 hr. so the flavors will mingle.

Preheat the broiler. Drizzle the olive oil on both sides of the swordfish, and season with salt and pepper. Broil for 4-5 minutes, flip over steaks, and broil another 4-5 minutes, or until opaque. Alternatively, you can grill the swordfish or pan fry on the stovetop. Makes 2 servings.

Serving suggestion: steamed sugar snap peas lightly seasoned with extra virgin olive oil, fresh mint, & salt and pepper are a lovely side vegetable.

If you're unfamiliar with selecting and cutting a mango, then check out Rachel’s tutorial at Coconut and Lime.


Save This Page on Del.icio.us

Sunday, March 4

Kisses & Kumquats

We tend to remember firsts in life. Our first kiss, our first concert, our first kumquat. I remember my first kumquat. It was on Sunday, February 26, 2006 at 9:14 AM at our farmers' market. (My first kiss was somewhat before then).

Kumquats' teeny size and bright orange rind make them impossibly cheerful. I was enamored at first sight.

"Those are so cute," I said to the farmer. "What are they?"

"Kumquats" he answered.

"What do they taste like?" I asked.

"Here, try for yourself," he said, handing me one.

Unsure how to peel it, I asked, “Do you just eat the whole thing?”

“The whole thing,” he said.

I bit into the kumquat, whose exterior is like a delicate orange rind, only sweeter. Then my teeth sunk into the flesh, and the juice squirted into my mouth. POW! a jolt of tartness hit my taste buds, and my salivary glands instantly went into overdrive. Involuntarily, my cheeks sucked-in, my lips puckered, and my eyes squinted. Just writing that sentence (and looking at that picture) made me have a visceral reaction again.

Like everything in else in life, it’s all about expectations. Kumquats are deceptive. Their diminutive size and adorable appearance makes them seem harmless, but they sucker-punch you with an intensely tart citrus flavor. It's like expecting the sweetness of a gummy bear but getting the whallop of a Sour Patch Kid (which I happened to love when I was a girl).

Cooking kumquats, however, mellows their acidity, making them a refreshingly tangy, citrusy compliment to seafood and tofu. Though many kumquat recipes are for desserts and jams, they also work well in savory dishes.

Here are a couple more kumquat recipes I've found. Rachel from Coconut and Lime has a deliciously refreshing Kiwi Kumquat Salad featuring raw kumquats while Gattina from Kitchen Unplugged has an elegant Kumquat Chiffon Cake featuring caramelized kumquats.

I am submitting this recipe to Kalyn of Kalyn's Kitchen who is hosting this week's Weekend Herb Blogging.


Pan Seared Sea Scallops with Kumquats
Makes 2 servings.
Print recipe only here.

1 shallot, thinly sliced
1 tsp olive oil
½ cup seeded, thinly sliced kumquats
½ fresh green jalapeno, diced
½ cup orange juice or tangerine juice
1 tsp lime juice
1 tsp honey
6-8 sea scallops
2 tsp butter
1 tsp olive oil
1-2 tsp fresh cilantro, finely chopped

1 Tbsp pistachios

1 cup cooked basmati or jasmine rice

Combine juice, kumquats, shallot, lime juice, jalapeno, and honey in a small saucepan; bring to a boil. Reduce heat, and simmer 3 minutes or until slightly thickened.

Pat scallops dry with a paper towel before cooking to produce less splatter and to sear more effectively. Heat a non-stick skillet over medium-heat high, add 2 tsp butter and 1 tsp olive oil. Once melted and bubbly, add the scallops; cook for 2-3 minutes per side or until golden and browned and just opaque in the center.

Arrange rice on plates; add 3-4 scallops, and top with kumquat sauce. Sprinkle with chopped cilantro and pistachios.


Save This Page on Del.icio.us

Sunday, February 11

Forget Chocolate, Eat Fennel on Valentine's Day

As a little girl, my favorite candies were Twizzlers ® and black jelly beans. Every Easter I would pick all the black jelly beans out of the bowl and leave the rest for everybody else. Though I rarely eat jelly beans any more, I love to cook with fennel, which has a distinctive licorice scent and flavor.

Although fennel has become fashionable over the last couple of years, this herb has actually been enjoyed in cooking since antiquity (see Lucretia Drusilla's "Whole Cooked Goat with Fennel" from her 02 February 53 BCE post). Many cultures use fennel as a culinary ingredient and as an herbal medicine, and as evidenced at my house, it’s a staple in Italian cooking.

It is a remarkably versatile herb and pairs beautifully with fruits such as oranges and apples as well as classic Mediterranean ingredients such as olives and eggplant. When eaten raw, its crunchy celery-like texture and sweet licorice flavor gives depth to salads. When sautéed or roasted, it takes on a savory quality. In fact, all parts of the fennel, from the bulb to the feathery fronds, are edible.

And since it’s St. Valentine’s Day this week, I thought you'd like to know that ancient Romans considered fennel an aphrodisiac and likely would have used it instead of chocolate for a romantic evening. As so many culinary trends are cycical, I'm predicting that fennel will become the new chocolate for Valentine's Day.

I can see it now: Food Network's Fennel February, heart-shaped fennel treats on the cover of Gourmet, contestants choosing fennel for the Passionate Dish Elimination Challenge on Bravo's Top Chef....

By the way, I have submitted this post for Weekend Herb Blogging which is being hosted by Kalyn of Kalyn's Kitchen this week.


Tagliatelle with Pan-Seared Shrimp and Fennel
Makes 2 servings
Print recipe only here.

4 oz tagliatelle (or linguine-type pasta)
4 Tbsp olive oil
1 small garlic clove, minced
1 small fennel bulb, thinly sliced
20-24 extra large raw shrimp
¼ cup sliced mixed green and black olives, such as Nicoise, Cerignola, or Kalamata
2 Tbsp sun-dried tomatoes, thinly sliced
1 Tbsp fresh basil, thinly sliced
1 Tbsp fresh parsley, thinly sliced
A few shakes of crushed of red pepper
Salt, to taste

Cook pasta in salted water according to directions.

In a large skillet over medium heat, add 2 Tbsp olive oil. Add fennel, and sauté for 3-4 minutes until it begins to brown; add garlic, and sauté 1 more minute. While the fennel is still slightly firm, remove from heat, and place in a bowl. Add the olives, sun-dried tomatoes, basil, parsley, crushed red pepper, and salt.

In the same skillet over medium-high heat, add another 2 Tbsp of olive oil. Add the shrimp, and sauté for 5-7 minutes, turning to ensure that they brown nicely on both sides.

Add the cooked pasta and the fennel mixture into the skillet with the shrimp; toss well. Plate the pasta; sprinkle with more fresh basil and parsley. Finish it off with a drizzle of good extra virgin olive oil.


Save This Page on del.icio.us
Digg!

Saturday, January 20

Q:"What happened to your neck?" A:"Polenta."


My mom loves to tell this story. One day she went to visit her friend Dee. When Dee opened the door, my mom immediately noticed a half-dollar sized, bright red mark on Dee’s neck. Concerned, she asked her, “What happened?” Gingerly touching the area, Dee answered in one word, “Polenta.”

If you’ve ever made polenta, then you understand. When it boils, it takes on an bubbling lava-like behavior. When the bubbles burst they make a mess of your stovetop (and if you’re not careful a mess of you too). Despite these bodily risks, I make polenta all the time. I typically use regular polenta, but the quick-cooking kind is often not bad. Although heretical to some chefs, I do not cook my polenta for one or two hours; rather, I cook it for about 30 minutes. In his cookbook, “Jamie’s Italy,” Jamie Oliver (whom I have a culinary crush on) says he cooks it for 40-45 minutes; I've done that too. Just be sure that the polenta has absorbed the liquid and has become thick. That’s when it’s done.

Polenta is one of the classic Italian "peasant dishes." Growing up, we often ate it with a simple marinara sauce and grated cheese. It's wonderfully versatile though. You can make it soft and creamy or so firm that you can cut it into slices and sautée until crispy. It can made with just water or a mixture of water and milk, like I did here (it comes a bit creamier that way). The fruit salsa is adapted from an original recipe in Cooking Light. I used Satsuma tangerines (pictured on the tree next to my apartment here) because they're in season. After reading a wonderful blog at Smitten Kitchen, I realize that some people really don't like cilantro; if you're one of them, just omit it or substitute with mint.

Fiery Shrimp with Avocado-Pomegranate-Tangerine
Salsa served over Soft Polenta
Print recipe only here.

SALSA:
1 small Hass avocado, diced
1 Satsuma tangerine or other tangerine
¼ cup pomegranate seeds
1 tsp lime juice
1-2 scallions, thinly sliced
1 tsp honey
½ small jalapeno, de-seeded (omit if the heat in the shrimp is enough for you)
½ tsp fresh grated ginger
1-2 Tbsp each of cilantro and basil
Salt, to taste

SHRIMP:
1 Tbsp canola oil
14-16 extra large shrimp, peeled and deveined
½ small jalapeno, with seeds (why else would I call it “fiery”?)
1-2 tsp lime juice
A pinch of lime zest
A pinch of salt

POLENTA:
½ cup yellow polenta
1 cup water
1 cup fat-free milk*
1 tsp butter
Salt and pepper, to taste

To prepare the polenta, simply combine the water, milk, butter, and salt in a medium saucepan and bring to a boil. Slowly pour in the polenta, whisking all the while. The polenta will start to bubble and spit pretty quickly. When it does, place a cover on it leaving a little space for the air to escape; reduce heat to a low simmer, and stir every few minutes, making sure to scrape the pan so the polenta doesn’t stick. After about 10 minutes, add some more water and stir to keep the polenta from becoming too dry. Cook another 15-20 minutes or until the consistency is thick and creamy; Jamie says it should “lollop off the end of a spoon.” Most chefs add butter to it at this point, but for this recipe, I find it too rich. It’s up to you.

To prepare the salsa, simply mix all of the ingredients in a bowl and toss gently to coat.

To prepare the shrimp, mix the cleaned shrimp with the remaining ingredients. Heat the oil in a skillet over medium-high heat. Add the shrimp and sauté for 5-7 minutes, turning to ensure that they brown nicely on both sides.

To serve, plate the polenta; add the shrimp and salsa; garnish with cilantro and basil. This makes 2 servings.

*TWO MORE CENTS: I actually have to use Lactaid milk which works fine. Also, I eat mine with tofu instead of shrimp.

Care of polenta injuries: According to my husband Jeff (who has just 5 months left of his Dermatology residency), if you develop a blister, do not pop it. This increases the risk of infection. If the blister becomes intolerable, however, then use a sterile needle to punch a small hole and let the blister collapse back on the wound. (Four years of medical school and four years of residency to learn that).

Note: Food Blogga is not meant to diagnose or cure any diseases caused by careless cooking. If you are injured by polenta, consider dialing 911 and purchasing cover up make-up.