Showing posts with label farmers' market. Show all posts

Thursday, June 16

Fresh Peas: A Springtime Indulgence

orange spiked peas with dill

Peas are playing hard to get this spring in San Diego. For the past several weeks, I have been seeking them out, to no avail. Then a couple of weeks ago at the Little Italy Mercato, I spied some. Elated, I dropped the potatoes I was buying, shoved my bags into Jeff's already overburdened arms, with an, "I'm sorry, Babe, but it's fresh peas!" and rushed over to them. I grabbed a bag, eagerly filled it until it bulged, then handed it to the farmer. I was envisioning the bowls of warm minted peas, risotto with peas and pancetta, and farro with peas and artichokes I would soon be eating, when I was interrupted by the farmer.

"$16 dollars, please," she said.

Assuming I had misheard her, I said, "Six dollars?"

"No," she replied, "Six-TEEN dollars," and smiled broadly at me. "They're nine dollars a pound."

Nine dollars a pound? Last year, they were $3.99 a pound. No kidding. Look at the sign below.
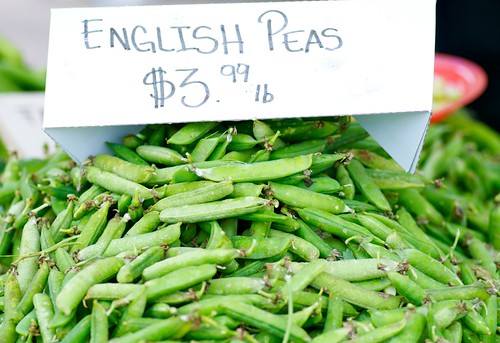
fresh English peas from Hillcrest farmers' market in San Diego

I hesitated. Suddenly my jubilation about eating spring peas was tempered with guilt. Should I really pay sixteen dollars for a bag of peas? I gazed at the cheerful, plump little darlings and rolled the bag over my palms, enjoying the feeling of their marble-like smoothness. That's when I realized, hey, these are already shelled.

As if reading my mind, the farmer added, "They're more money, but they're already shelled. It's easier for you." She flashed me another broad, toothy smile. Well, I'll get three or four meals out of them, I thought.

I smiled back and handed her a twenty dollar bill.

Orange Spiked Peas with Dill
Makes 6 side servings
Printable recipe.

3 cups shelled fresh English peas
1 tablespoon butter
2 teaspoons fresh minced ginger
Zest of 1/2 orange (about 2 teaspoons)
2 tablespoons orange juice, preferably fresh squeezed
1/8 teaspoon freshly ground black pepper
1/8 teaspoon salt
2 tablespoon finely chopped fresh dill

1. In a large skillet over medium heat, melt butter. Add peas and cook for 1 minute, stirring to coat with butter. Add ginger, orange zest and juice, and salt and black pepper. Cook for 2 to 3 minutes, stirring a few times, until cooked through and just slightly wrinkled. You want them al dente, not mushy. Turn off heat, and stir in fresh dill.

Variations:
Serve atop cooked couscous, quinoa or brown rice with sauteed tofu or shrimp.

You might also enjoy these fresh peas recipes:
Minted Fresh Peas recipe from Leite's Culinaria
Barley Risotto with Peas recipe from Guilty Kitchen
Warm Three Pea and Radish Salad recipe from Food Blogga
Pasta with Peas, Prosciutto, and Parmesan recipe from Blue Kitchen
Lemony Pasta with Fresh Peas, Ricotta, and Mint recipe from Food Blogga
Spring Frittata with Peas, Leeks, and Zucchini recipe from Ms. Adventures in Italy
Springtime Farro with Baby Artichokes, Mushrooms, and Peas recipe from Food Blogga

Monday, March 3

Sunday, Bloody (Orange) Sunday

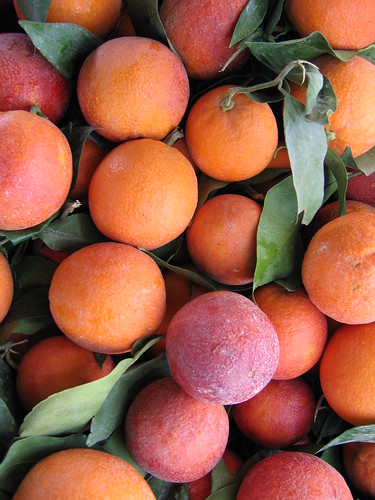
Blood Oranges at Farmers' Market

It rained here for the last three weekends. As a result, the Sunday farmers' market was nearly empty. (Southern Californians don't go out in the rain.) So, it's been just a few farmers, some die-hard vegetarians, and a handful of New England transplants.

This all changed yesterday. It was the quintessential San Diego day -- a glorious 72 degrees, sunny, with a light breeze. You couldn't move at the farmers' market. People were clamoring for colorful rainbow carrots, luscious Meyer lemons, and tart pink grapefruit.

The biggest attraction was the exceptionally juicy, tangy blood oranges that beckoned market-goers with their ruby-colored flesh. One poor farmer handing out samples nearly got trampled on by a gaggle of Red Hats who were visiting. And there I was without my camera. Ugh.

So what's all the fuss about? Anthocyanin, the same chemical that makes blueberries blue and cranberries red, gives blood oranges their characteristic "bloody"color. It can range from bright ruby red to deep burgundy and has an exceptionally pleasing sweet-tart flavor unlike any other orange.

It's more than just their brilliant flesh that makes them so prized, it's their unique flavor -- like a sweet orange that has been infused with tangy tangerine and tart cherries.

Blood oranges are pricey--usually $3.00/ lb here-- but they're worth it. Their season generally runs from January-April, so now is the time to get them.

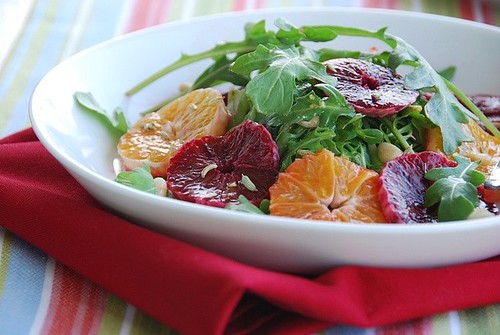
citrus and arugula salad

Try them in savory salads of bitter greens, zesty salsas for seafood, or even grain dishes. As for sweets, they're amazing in marmalades, delicious in baked goods, and sophisticated when paired with simple vanilla ice cream or pudding. Or you could eat 'em plain. Just don't wear a white shirt while doing so. Take my word for it.

Sicily has some of the world's must sought-after blood oranges, which was my inspiration for this peppery wild arugula salad with juicy blood oranges, tart pink grapefruit, and tangy minneolas (another citrus hybrid that is half grapefruit and half tangerine). Crispy, salty prosciutto contrasts pleasingly with the sweet-tart fruit while earthy pine nuts add complexity and texture. This is a salad that isn't easily forgettable.

Wild Arugula and Blood Orange Salad with Prosciutto
Serves 4
Print recipe only here.

Salad:
6 cups of wild arugula**
2 blood oranges, peeled and sliced cross-wise
1 pink grapefruit, peeled and sliced cross-wise
1 Minneola tangerine, peeled and sliced cross-wise
3 ounces proscuitto, torn into small strips
2 teaspoons toasted pine nuts

Orange-Fennel Vinaigrette:
1/2 teaspoon fennel seeds, toasted
1 tablespoon extra virgin olive oil
1 tablespoon rice vinegar
1/4 cup freshly squeezed blood orange juice or navel orange juice
1/4 teaspoon orange zest
2 teaspoons Dijon mustard
salt and pepper, to taste

To toast the pine nuts, place them in a small, dry skillet over medium heat. Shake the pan handle back and forth for 1-2 minutes, or until the nuts are golden brown and aromatic. Set aside.

To make the vinaigrette, place fennel seeds in a dry skillet over medium heat. Shake the pan handle back and forth for 1-2 minutes, or until slightly toasted and aromatic. Place in a bowl, and whisk in remaining vinaigrette ingredients.

Layer prosciutto slices in a medium skillet over medium heat for 30 seconds. Flip once and cook an additional 20-30 seconds or until crispy. Set aside.

Arrange fruit slices on a plate, top with a bunch of arugula, and 1/4 of the prosciutto. Drizzle with dressing, and sprinkle with pine nuts.

**Wild arugula is a svelter version of regular arugula and has a slightly more peppery flavor; it can be found in most organic stores such as Whole Foods. Of course, regular arugula can be substituted.

You might also like:


Save This Page on Del.icio.us

Tuesday, July 31

Summer is Time for Salsa and a New Handbag

There aren’t too women I’ve met who don’t love handbags (and shoes, but that’s another post). Recently, I was in Nordstrom when I overheard two women (an attractive blonde and an attractive brunette) justifying the purchase of a bag that was almost identical to the one on the brunette's shoulder.

“Yeah, but yours is more of a mocha color," the blonde explained. "Look -- and she held the bags next to each other-- this is definitely more chocolate than mocha. You have to get it." (See, there is a connection to food already.)

The brunette walked over to an available cashier and purchased her chocolate colored bag. I was astonished. Do women love handbags that much? Then I looked around me: half of the female population of Southern California were in Nordstrom that day, and fully half of them were in line holding new handbags.

Given that most women have inherited the autosomal dominant "handbag gene," it didn't surprise me to learn that even a reusable grocery bag could generate a stir. In case you missed it, Anya Hinmarch, a posh London designer, whose handbags go for hundreds and even thousands of dollars, created an eco-friendly tote bag imprinted with the words, "I'm Not A Plastic Bag." It was designed as a fashionable way to encourage people to stop using biodegradable-resistant plastic bags. It has been selling wildly all over the world, including here in the U.S. at Whole Foods. Women here were so eager to get one of these coveted bags that they waited in line for hours. That’s nothing, however, compared to what happened in Taiwan: In a frenzy to obtain one of these bags, a stampede resulted in 30 people actually being sent to the hospital.

Though I don’t think you should trample the woman in front of you to get one, I do think a reusable tote bag is an easy way to help the environment. Since the lovely Meeta of What’s For Lunch, Honey? has asked us to share some habits that help protect the earth for this month’s mingle, I’ve decided to submit this post. Though it’s a small thing, using a canvas tote bag can make a big difference. For more about the benefits of reusable bags and for tips click here. Also, Cate of Sweetnicks and Well Fed fame likes the tote bags from reusablebags.com which are made from recycled ad banners and seatbelt straps.


Any reusable bag will do, like this nifty one from my dad, who thought I'd like it for my farmers' market trips. I do; my only problem is I can't find the right heels to go with it. Maybe I'll head back to Nordy's....


This no-cook summertime salsa is a fresh, easy way to incorporate many of your farmers' market finds. Thanks for sharing Blush, the tomato, Alanna! With juicy cantaloupe, crunchy corn, and fiery jalapenos, it's a vibrant and flavorful medley of summer's finest fruits and veggies. Served atop grilled seafood or tofu and a cooked whole grain, such as quinoa (OK, this part requires some cooking, though very little), it makes a lovely summertime meal.

Susan’s Summertime Salsa


Print recipe only here.

1 cup diced cantaloupe
1 cup diced mango
1 cup diced red or yellow bell pepper
½ cup red or yellow cherry tomatoes
½ cup chopped cucumber (peeled and de-seeded)
1 ear of fresh sweet corn (cut from cob)
¼ cup diced red onion or scallions

2 Tbsp fresh lime juice (about one small lime)
Pinch of lime zest
1 Tbsp fruity olive oil
2 tsp fresh grated ginger (about a 1-inch sized piece)
2 Tbsp minced jalapeno, with or without seeds
Salt
2 Tbsp each chopped fresh cilantro, mint, and basil

Combine the first 7 ingredients in a bowl, and toss gently to blend.

Combine the lime juice through the salt in a small bowl; whisk until fully blended. Pour on top of the fruit mixture. Serve either at room temperature or chilled. Stir in the chopped fresh herbs just before eating so they don’t turn brown.

Note:

Fresh sweet corn on the cob can be eaten raw, which is delicious and crunchy. If you've never tried it before, then give it a go. You'll be glad you did.


If you don’t like the intensity of raw onions, simply pour some boiling water over them to remove their pungency, or sauté in a bit of olive oil.


You might also like:

Minding My Peas
Swordfish with Pineapple-Mango Salsa
Funky farmers' market produce


Save This Page on Del.icio.us

Friday, April 20

Why I Live in California Reason #2: Carrots

Despite grueling traffic, exorbitant real estate prices, and perpetual smog, Jeff and I have decided to stay in Southern California when he completes his residency in June. We have discussed this ad nauseum: we have wonderful families back in RI, the reimbursement is higher and the cost of living is lower there, and not to mention, there's no good Italian bread here.

There is no single reason we have made this decision, but one factor stands out above others: the weather. It's probably why most of the 15 million people who call Southern California home choose to live here. For Jeff and me, the second factor is one my food blog friends can appreciate: the produce.

Recently at our farmers’ market Jeff and I chatted with Neil, a local farmer, who is originally from London. (We adore London, the site of our honeymoon.) Curious why an aesthete Brit would move to Southern California, I asked Neil why he stays here.

“The weather,” he said. “I simply can’t live without the sun, and it’s sunny here all the time.”

“But don't you miss London with its rich history and culture?" I asked.

“Look, London is great,” he said, “but it’s always grey and rainy. In fact, I believe summer fell on a Wednesday there last year.”

Neil has a brilliant personality; so does his produce. He is from Weiser Family Farms where they sell organic, charismatic produce: blithe blue potatoes, cheeky green and purple cauliflower, and cheerful colored carrots.


Every week market-goers animatedly question him about his unique produce, which lately has included Jerusalem artichokes, Romanesco cauliflower, and crosne (Chinese artichokes, pictured below).

Neil, like so many farmers, is always informative; he teaches you about the produce and offers cooking tips and recipes as well.


One of our favorite vegetables from Weiser Family Farms is carrots. Not prosaic orange carrots, but kaleidoscope carrots with appealing names: Yellowstone (ripe lemon yellow), Purple Haze (rich, royal maroon), Nantes (deep pumpkin orange), and Atomic Red (firecracker red).


Unlike the orange “baby”carrots you find in the supermarket, these “mini” or "rainbow" carrots are about 5-6 inches long and come in a variety of colors. Though delicious raw, I prefer to roast them, allowing their natural sugars to caramelize. They are enhanced with any variety of fresh herbs; for this recipe, I used savory fresh thyme and chives which contrast beautifully with the carrots’ sweetness.

Carrots are as healthy as they are delicious (as I learned from researching my Fit Fare post). They are powerhouses of beta carotene, an antioxidant that lowers your risk of cancer, as well as lutein, which promotes ocular health. If you're crazy about carrots, then check out the World Carrot Museum. Yup. There's a virtual museum for carrots with more than you'd ever care to know about the world's #2 vegetable (potato is #1).

I am submitting this post to the Meeta for this month's Monthly Mingle which features spring food.

I also wish to apologize to Tigerfish of the delicious Teczcape who tagged me a while back about a favorite food gem, to which I have not had the chance to reply. It's clear that Neil and Weiser Family Farms is a diamond among jewels and an easy choice for "favorite food gem."


Roasted Rainbow Carrots

Makes 4 servings.
Print recipe only here.

Carrots:
1 lb. mini carrots, peeled or unpeeled (any color/variety available to you)
1-2 tsp olive oil
2 tsp chopped fresh thyme
2 tsp chopped fresh chives
A generous sprinkling of salt and pepper

Glaze:
1 tsp olive oil
1 tsp fresh lemon juice
A couple of pinches of lemon zest
2 tsp honey
Salt and pepper, to taste
Additional chopped fresh thyme and chives for garnish

Preheat oven to 425 degrees. Wash and peel carrots, and pat dry. (I actually leave the skin on since it is so tender and full of nutrients). Lay carrots on a baking sheet, and drizzle with olive oil. Add chives, thyme, and salt & pepper. Toss well to coat. Roast for about 15-20 min., turning once. The skins should slightly brown and blister.

Meanwhile, in a small bowl, whisk together olive oil, lemon juice, lemon zest, and honey until well combined. Season with salt and pepper as needed.

Drizzle glaze over the cooked carrots, and garnish with a sprinkling of chopped fresh thyme and chives.


Save This Page on Del.icio.us

Sunday, March 4

Kisses & Kumquats

We tend to remember firsts in life. Our first kiss, our first concert, our first kumquat. I remember my first kumquat. It was on Sunday, February 26, 2006 at 9:14 AM at our farmers' market. (My first kiss was somewhat before then).

Kumquats' teeny size and bright orange rind make them impossibly cheerful. I was enamored at first sight.

"Those are so cute," I said to the farmer. "What are they?"

"Kumquats" he answered.

"What do they taste like?" I asked.

"Here, try for yourself," he said, handing me one.

Unsure how to peel it, I asked, “Do you just eat the whole thing?”

“The whole thing,” he said.

I bit into the kumquat, whose exterior is like a delicate orange rind, only sweeter. Then my teeth sunk into the flesh, and the juice squirted into my mouth. POW! a jolt of tartness hit my taste buds, and my salivary glands instantly went into overdrive. Involuntarily, my cheeks sucked-in, my lips puckered, and my eyes squinted. Just writing that sentence (and looking at that picture) made me have a visceral reaction again.

Like everything in else in life, it’s all about expectations. Kumquats are deceptive. Their diminutive size and adorable appearance makes them seem harmless, but they sucker-punch you with an intensely tart citrus flavor. It's like expecting the sweetness of a gummy bear but getting the whallop of a Sour Patch Kid (which I happened to love when I was a girl).

Cooking kumquats, however, mellows their acidity, making them a refreshingly tangy, citrusy compliment to seafood and tofu. Though many kumquat recipes are for desserts and jams, they also work well in savory dishes.

Here are a couple more kumquat recipes I've found. Rachel from Coconut and Lime has a deliciously refreshing Kiwi Kumquat Salad featuring raw kumquats while Gattina from Kitchen Unplugged has an elegant Kumquat Chiffon Cake featuring caramelized kumquats.

I am submitting this recipe to Kalyn of Kalyn's Kitchen who is hosting this week's Weekend Herb Blogging.


Pan Seared Sea Scallops with Kumquats
Makes 2 servings.
Print recipe only here.

1 shallot, thinly sliced
1 tsp olive oil
½ cup seeded, thinly sliced kumquats
½ fresh green jalapeno, diced
½ cup orange juice or tangerine juice
1 tsp lime juice
1 tsp honey
6-8 sea scallops
2 tsp butter
1 tsp olive oil
1-2 tsp fresh cilantro, finely chopped

1 Tbsp pistachios

1 cup cooked basmati or jasmine rice

Combine juice, kumquats, shallot, lime juice, jalapeno, and honey in a small saucepan; bring to a boil. Reduce heat, and simmer 3 minutes or until slightly thickened.

Pat scallops dry with a paper towel before cooking to produce less splatter and to sear more effectively. Heat a non-stick skillet over medium-heat high, add 2 tsp butter and 1 tsp olive oil. Once melted and bubbly, add the scallops; cook for 2-3 minutes per side or until golden and browned and just opaque in the center.

Arrange rice on plates; add 3-4 scallops, and top with kumquat sauce. Sprinkle with chopped cilantro and pistachios.


Save This Page on Del.icio.us

Saturday, February 24

When the Moon Hits Your Eye, Like A Big Broccolini Pie, That's Amore

When Jeanne from Cook Sister! announced that pies would be the topic for this month’s Waiter, there’s something in my… food blog event, I knew exactly what I was going to make.

Where I grew up, every neighborhood was dotted with family-run bakeries and pizzerias. Just walking along the famed Federal Hill, the wafting aromas of freshly baked wood-fired pizzas and warm yeasty breads could make even the most carb-averse person swoon. And if the smell wasn't enough to entice you, then the sight was: crispy, steaming-hot breads, calzones, and pizzas proudly propped in the store windows beckoning you to come in and have one. And considering how many times I have been lured inside (especially at Buono’s and Crugnale’s Bakeries), I can assure you that they are impossible to resist.

Calzones are true comfort food. They quell your worst hunger and leave you feeling content. Their versatility of fillings ensures that there’s something for everyone to love. And best of all, for me, they do what comfort food should do: remind me of home.

My mom and I have made hundreds of calzones over the years; what’s funny is that we always called calzones filled with eggplant or sausage or meatballs "calzones," but calzones filled with spinach or broccoli were called "pies." Which got me thinking, what’s the difference? Nothing. Turns out a spinach or broccoli pie is just another name for a calzone.

The calzone, originated in Naples, Italy, is often referred to as a “turn-over” or "half-moon" and is made of pizza dough that is filled with cheeses, vegetables, and meats. Though mozzarella cheese is most commonly featured here in the US, many other types of cheese such as fresh ricotta, Provolone, and Parmesan are used as well. Calzones can be deep-fried, but I’ve always had baked. No matter the name, they all share one common trait: they are oh so satisfying.

I’m putting a little California twist on this recipe. Broccolini just debuted at the farmer’s market and is one of my favorite vegetables. As I learned last week, it is not merely young or baby broccoli; rather, it’s a hybrid of broccoli and Chinese kale. Broccolini are delicate, a svelte version of regular broccoli, and they have a beautiful grassy green color. Their flavor is reminiscent of broccoli but is distinctly sweeter, with a pleasing peppery aftertaste. In this recipe, its sweetness contrasts nicely with the rich sun-dried tomatoes, salty olives and cheese, and toasty pinenuts. Of course, you can substitute regular broccoli or the bolder broccoli rabe (rapini).


Broccolini and Sun-Dried Tomato Pie (or Calzone)

Print recipe only here.

2 tsp olive oil, plus 2 tsp for brushing on top of pies
1 pound pizza dough (brought to room temperature)
1/8 cup sun-dried tomatoes, thinly sliced (dry-packed or oil-soaked)
1/8 cup pine nuts, toasted
1 cup broccolini, chopped
¼ cup black olives, such as Cerignola and Kalamata
½ cup grated Parmesan Reggiano cheese
A few shakes of crushed red pepper
A few dashes of salt

Note: If you’re using dry-packed sun-dried tomatoes, then allow them to rest in warm water for 5 minutes before slicing.

To toast the pinenuts, place in a dry skillet over medium heat for about 1 minute or until golden brown. Shake the pan handle gently to ensure even toasting. Remove from heat.

In a large skillet, heat 2 tsp. olive oil; sauté broccolini for about 1-2 minutes until it turns bright green yet remains firm. Add remaining ingredients and gently mix. Heat for 1 minute more, then remove from heat. Taste the filling to adjust seasonings.

To form the pies:
Working on a lightly floured surface, divide the dough in half, and roll into two 8-10-inch ovals. For each piece of dough, put half of the broccolini mixture a bit above the center of the oval. Fold the dough to form a half-moon; seal the edges together by pressing down lightly. Then using your fingertips, fold the edge of the dough up, and pinch around the edge to create a seal. Brush them with the remaining 2 tsp of extra-virgin olive oil.

Baking pies on a baking sheet:
Preheat oven to 375 degrees. Line a baking sheet with parchment paper. Bake on a rack in the lower third of the oven for about 20 minutes or until the bottom is browned. Then bump up the heat to 425, and move the pan to the upper third of the oven; bake an additional 15 minutes or until the top of the pie is golden brown and crispy.

Baking pies on a pizza stone:
Preheat the oven to 475-500 degrees, and heat the stone for at least 30 minutes. Cook pies directly on the heated stone for about 15 minutes or until both the bottoms and tops are golden brown and crispy.

1 pound of dough will make 2 large pies.

Save This Page on Del.icio.us

Sunday, February 11

Forget Chocolate, Eat Fennel on Valentine's Day

As a little girl, my favorite candies were Twizzlers ® and black jelly beans. Every Easter I would pick all the black jelly beans out of the bowl and leave the rest for everybody else. Though I rarely eat jelly beans any more, I love to cook with fennel, which has a distinctive licorice scent and flavor.

Although fennel has become fashionable over the last couple of years, this herb has actually been enjoyed in cooking since antiquity (see Lucretia Drusilla's "Whole Cooked Goat with Fennel" from her 02 February 53 BCE post). Many cultures use fennel as a culinary ingredient and as an herbal medicine, and as evidenced at my house, it’s a staple in Italian cooking.

It is a remarkably versatile herb and pairs beautifully with fruits such as oranges and apples as well as classic Mediterranean ingredients such as olives and eggplant. When eaten raw, its crunchy celery-like texture and sweet licorice flavor gives depth to salads. When sautéed or roasted, it takes on a savory quality. In fact, all parts of the fennel, from the bulb to the feathery fronds, are edible.

And since it’s St. Valentine’s Day this week, I thought you'd like to know that ancient Romans considered fennel an aphrodisiac and likely would have used it instead of chocolate for a romantic evening. As so many culinary trends are cycical, I'm predicting that fennel will become the new chocolate for Valentine's Day.

I can see it now: Food Network's Fennel February, heart-shaped fennel treats on the cover of Gourmet, contestants choosing fennel for the Passionate Dish Elimination Challenge on Bravo's Top Chef....

By the way, I have submitted this post for Weekend Herb Blogging which is being hosted by Kalyn of Kalyn's Kitchen this week.


Tagliatelle with Pan-Seared Shrimp and Fennel
Makes 2 servings
Print recipe only here.

4 oz tagliatelle (or linguine-type pasta)
4 Tbsp olive oil
1 small garlic clove, minced
1 small fennel bulb, thinly sliced
20-24 extra large raw shrimp
¼ cup sliced mixed green and black olives, such as Nicoise, Cerignola, or Kalamata
2 Tbsp sun-dried tomatoes, thinly sliced
1 Tbsp fresh basil, thinly sliced
1 Tbsp fresh parsley, thinly sliced
A few shakes of crushed of red pepper
Salt, to taste

Cook pasta in salted water according to directions.

In a large skillet over medium heat, add 2 Tbsp olive oil. Add fennel, and sauté for 3-4 minutes until it begins to brown; add garlic, and sauté 1 more minute. While the fennel is still slightly firm, remove from heat, and place in a bowl. Add the olives, sun-dried tomatoes, basil, parsley, crushed red pepper, and salt.

In the same skillet over medium-high heat, add another 2 Tbsp of olive oil. Add the shrimp, and sauté for 5-7 minutes, turning to ensure that they brown nicely on both sides.

Add the cooked pasta and the fennel mixture into the skillet with the shrimp; toss well. Plate the pasta; sprinkle with more fresh basil and parsley. Finish it off with a drizzle of good extra virgin olive oil.


Save This Page on del.icio.us
Digg!

Friday, February 9

Of Yankees and Yams

I always thought yams and sweet potatoes were different vegetables. A few years ago a farmer taught me differently. We had just moved to North Carolina from Rhode Island and went to the Raleigh Farmers' Market looking for yams. We saw a farmer with a 3-foot high pile of tubers on his table and a single cardboard sign labled "Sweet Potatoes." So I asked him, "Do you have any yams?" He answered, "They're right 'ere," picking up one of the potatoes from the table in front of us. "No, yams," I said. "Yeah, right 'ere," he repeated, handing me the sweet potato.

I looked over at Jeff thinking: Great, these Southerners don't know the difference between a sweet potato and a yam.

At the same time the farmer looked over at his wife behind the cash box thinking: Great, another Yankee who doesn't know the first thing about potatoes.

He then explained to me that a yam is really just an orange-fleshed sweet potato. Unlike their white-fleshed counterparts, however, these tubers are so sweet that even when eaten plain they taste like sugar has been added to them. In fact, that first week I used them to make a sweet potato pie (from a wonderful recipe from this same farmer). I brought him a piece the next weekend. Who would have known that the simple sweet potato (er, yam) could be the basis of a rapprochement of the North and South.

I tossed this recipe together recently with some fresh citrus and ginger to add a little sparkle. I've also used winter squash or carrots instead of yams.

Baked Yams with a Citrus Glaze and Toasted Pecans

Makes 2 servings.
Print recipe only here.

1 large yam
Some cooking spray or a little olive oil for coating the yam
1 tsp butter
¼ cup orange or tangerine juice
1 tsp of good honey
About 1 tsp of grated fresh ginger
About 1 tsp of orange zest
About 1 tsp of lemon zest
A pinch of ground cinnamon
A pinch of nutmeg
Some salt and pepper, to taste
Chopped, toasted pecans for garnish

To toast the pecans, pre-heat the oven to 325 degrees. Layer the pecans on a baking sheet, and bake for 10 minutes, or until slightly toasty and aromatic.

Bump up the oven temperature to 400 degrees. Line a baking sheet with tinfoil (for easy clean-up). Slice a yam in half, lengthwise, and coat the flesh with some cooking spray or a little olive oil; place face down on baking sheet. Bake at 400 degrees for about 30 minutes, or until a fork easily pierces it. Remove from oven, and let cool.

Meanwhile, in a small pan over medium-low heat, whisk the butter, orange juice, and honey until combined. Add the remaining ingredients, and heat for a couple of minutes, until it begins to slightly thicken and bubble up.

Once the yams are cooled, scoop out the cooked flesh, and place it in a bowl. Pour the citrus glaze on top, and mix well. Add toasted pecans.

Serving Suggestion: This pairs well with pan-seared tofu or pork.

Wednesday, February 7

Squash's Swan Song

Growing up in New England, I’ve always anticipated the arrival and lamented the passing of the seasons. Having lived in Southern California for a few years now, I’ve come to realize that there are no seasons here. Oh, sure, we pretend it’s winter by donning our wooly knitted scarves, but then undermine any attempt at credibility by pairing them with flip-flops and oversized Channel sunglasses.

Now, I realize it’s February, and squash and yams had their leading roles back during Thanksgiving dinner. But, I’m sure most of you still have some around and might like a new recipe or two. If you do, then check out a simply delicious squash soup at Cookiecrumb's hilarious site I'm Mad and I Eat (01.Feb.07 post). I've also got a couple of recipes up my sleeve that will enliven these former ingenues with some seasonal citrus.

This is my recipe for squash; on my next post, I’ll share one for yams. Since roasting vegetables causes their natural sugars to caramelize into a satisfyingly sweet delight, it remains my favorite method of preparation. With the sugary, chewy dates in this dish you could practically call it dessert. Okay, even I don’t believe that. Just eat this, then eat chocolate.

Roasted Acorn Squash with Medjool Dates and Toasted Almonds
Makes 4 servings.
Print recipe only here.

1 medium acorn squash or other winter squash (about two cups)
2 tsp butter
1 shallot, chopped
1 tsp brown sugar
The juice of ½ small lemon (about 1 tsp)
A little bit of lemon zest
A pinch of ground cinnamon
5-6 Medjool dates,* coarsely chopped
¼ cup toasted almonds, coarsely chopped
1-2 tsp fresh parsley, chopped
Some salt and pepper, to taste

To toast the almonds, pre-heat oven to 350 degrees. Spread almonds in a single layer on a baking sheet. Bake for 8-10 minutes, or until slightly golden and aromatic.

Bump up the heat in the oven to 375 degrees. Roast the squash face side down for 35-45 minutes or until tender when pierced with a fork. Remove from the oven, and let cool. Scoop out the cooked flesh, and set aside.

Meanwhile, in a large skillet over medium heat, sauté shallots in butter until slightly caramelized. Add brown sugar, lemon juice, lemon zest, and cinnamon. Add the cooked squash, and mix well by hand. (You can puree it at this point if you like, but I prefer a lumpy texture). Stir in the dates, and season well with salt and black pepper. Remove from heat. Stir in chopped almonds and fresh parsley. Garnish with more almonds and parsley before serving.


*TIP: Medjool dates are sweeter than most varieties, and have a soft, creamy texture and deep amber-brown color. I usually buy them at the farmers’ market, but Trader Joe’s and all major markets sell them. If you can’t find them, then just substitute a different variety.

Monday, January 29

Broccoli Marries Pasta

The final featured vegetable of the cruciferous make-over (see Brussels Sprouts on Botox and Cauliflower Gets New Clothes) is broccoli. Otherwise known as the vegetable that our mothers made us eat so we could have dessert. That is until you’ve tried broccoli made by Jeff’s mother. I had the good fortune of having three wonderful role models for cooking: my grandmother, my mother, and my mother-in-law. Jeff’s mom, Dorothy, (also Italian and from RI) is an outstanding cook -- as it has been said: the woman could make sawdust taste good.

I first ate her lemony broccoli pasta with breadcrumbs when Jeff and I were dating (Jeff says it helped to convince me to marry him). This is an adaptation of her recipe. She’s really excited about this blog. She actually told Jeff that I have become her second favorite, right after Giada from the Food Network. If you knew my mother-in-law, then you would understand that that is a HUGE compliment!

Although I think fresh pasta is always superior to dried, it’s not always practical; I am actually all out myself, unless Jeff at the delicious C for Cooking would like to mail me some (see his 26 Jan. 07 post). But I do think dried pasta is fine for this recipe; I like Barilla. Just be sure to keep both the pasta and the broccoli al dente.

My husband just added, “Tell them not to skimp on the Grana Padano!" So, there you have it.

DOROTHY’S PASTA with LEMONY BROCCOLI, WALNUTS, and TOASTED BREADCRUMBS

Print recipe only here.

2 Tbsp olive oil
1 large garlic clove, finely chopped
2 shallots, thinly sliced
4 cups broccoli florets
About 2 tsp fresh lemon juice
A little bit of lemon zest
8 oz pasta (I used cellentani; I also like penne or rigatoni, 'cause the breadcrumbs adhere well to them)
½ cup walnuts, toasted
½ cup breadcrumbs, toasted
A few shakes of crushed red pepper
A few shakes of salt
A non-skimpy portion of good grated Grana Padano
A handful of chopped fresh parsley for garnish
Some good olive oil to drizzle on top

Preheat oven to 325 degrees. Layer walnuts on a baking sheet, and bake for 10 minutes, until slightly golden and aromatic.

To toast the breadcrumbs, place in a skillet on the stovetop; slightly shake until golden and evenly toasty, just a couple of minutes. Remove from pan, so that the heat won’t continue to toast them.

Cook pasta in salted water according to directions.

Add olive oil to a skillet. Over medium heat, sauté garlic and shallots until slightly caramelized. Add the broccoli, lemon juice and zest, red pepper flakes, and salt. Cook for 3-4 minutes or until the broccoli turns a brilliant green and remains firm to the touch. Add your cooked pasta to the skillet with the broccoli mixture, and toss in the toasted walnuts and breadcrumbs.

Plate the pasta; sprinkle with a healthy dose of grated Grana Padano cheese and some fresh parsley. Finish it off with a drizzle of good extra virgin olive oil.
Makes 4 servings.

Saturday, January 27

Cauliflower Gets New Clothes


The second featured vegetable of the cruciferous make-over (see Brussels sprouts on Botox) is the cauliflower. And there will be no boiling involved.

One day back in the '80's, my mother, desperate for a way to get us to eat cauliflower, decided to egg and breadcrumb it, then fry it. Brilliant. Now it was kid-friendly finger food that was good for you too. (Okay, maybe not the oil; but at least she didn’t use a deep fryer.)

To get the breaded cauliflower satisfyingly crunchy, I bake it in a high oven—no frying necessary. And I've smartened it up with a flavorful olive and fresh herb tapenade that takes minutes to make.

CRISPY BREADED CAULIFLOWER with an OLIVE and HERB TAPENADE
Makes 4 servings.
Print recipe only here.

1 medium head of cauliflower
4 egg whites
2 cups plain breadcrumbs
Salt and pepper

½ cup minced mixed cured olives, such as Kalamata, Cerignola, Nicoise
2 Tbsp good olive oil
1 Tbsp minced fresh basil
1 Tbsp minced fresh parsley
2 Tbsp finely grated Parmesan cheese
A couple of pinches of red pepper flakes

In one small bowl, place eggs whites. In another small bowl, place breadcrumbs seasoned with a little salt and pepper.

Meanwhile, break the cauliflower into small florets. Dip each floret in the egg, letting any excess fall back into the bowl. Then dip in the breadcrumbs, turning the floret until it is completely coated. Place the breaded cauliflower on a baking sheet lined with tinfoil and lightly coated with cooking spray (for easy clean-up).

Bake at 400 degrees for 15 minutes; turn the florets over; bake another 10 minutes; remove from the oven. Either top with the tapenade or serve it on the side. It’s best eaten right away while it’s hot and crunchy.

Wednesday, January 24

Brussels Sprouts on Botox

It happens every Sunday. Clamoring crowds jostle for space around the popular tables at the farmers’ market to check out the hip Meyer lemons, the chic wild arugula, and the sexy red strawberries (yes Dad, we really did have fresh strawberries this past week).

Not so at the cruciferous vegetables table. There lie the Brussels sprouts, kale, cabbages, broccoli, and cauliflower (of which only the funky Romanesco variety is getting any attention). These uncomely vegetables patiently wait for someone to come by and check them out. It is a long wait.

This past Sunday the Brussels sprouts were carelessly dumped in a lop-sided pile, causing stray runaway sprouts to keep rolling off the table's edge and onto the concrete. Inspired by Molly’s witty post at Orangette, I thought I would take on a challenge. A makeover for three undatable vegetables: Brussels sprouts, cauliflower, and broccoli. The make-up? Breadcrumbs.

There aren’t many foods in Italian homes that don’t get egged and breadcrumbed to spectacular results. Vegetables from eggplant to zucchini, meats from chicken to veal, and seafood from calamari to smelts, when made with the right breadcrumbs, are brilliant in their simplicity and fabulous in their flavor. Fortunately, my mom and dad had recently sent me a fresh container of Buono’s Bakery breadcrumbs from Rhode Island.

Seriously. My parents actually ship me breadcrumbs.

Turns out that the closest place to get good breadcrumbs from my apartment in LA is exactly 2,970 miles away (I Google mapped it). We cannot get good breadcrumbs here. "You’re crazy!" you say. Nope. We’re not. We have lived in California for 3 ½ years; we have tried pounds of breadcrumbs. They just don't compare. Every time we got breadcrumbs, we would always say, "Well, they’re not as good as Buono’s." So we decided, why not have mom ship us some? And so it began. As you will learn from this blog, there are many things which are shipped from RI to CA, most of which originate from Federal Hill in Providence.

If you can’t get Buono’s breadcrumbs, you can:

1. Make them from scratch.
2. Use Panko breadcrumbs.
3. Ask my mom to send you some. Actually, don’t. She seriously would send them to you.

Today, I’ll share the Brussels sprouts recipe; the cauliflower and broccoli ones will follow shortly. To keep my meals low-cal and healthy, I don’t fry vegetables; I prefer to bake them in a hot oven or to sauté them with a little bit of olive oil or butter. While I often make Brussels sprouts with a maple syrup or brown sugar glaze, I love this lighter, cleaner version as well. Here, the sprouts are par-boiled then sautéed until blistered, browned, and slightly crunchy. The savory butter and garlic mellows the sprouts’ bitterness, and the citrus adds a tangy, bright touch. It’s a breeze to make, and with the right lighting and make-up, even Brussels sprouts can look pretty.


Brussels Sprouts with Toasted Breadcrumbs and Lemon
Makes 4 servings.
Print recipe only here.

3 cups Brussels sprouts,halved
1 small garlic clove, minced
2 Tbsp butter
1 Tbsp lemon juice
Pinch of lemon zest
¼ cup breadcrumbs, toasted
Salt & pepper, to taste

Peel off any marked outer leaves of the sprouts and trim the bottoms; slice in half. Boil for 3-4 minutes. Drain and plunge into a bowl of ice water; this will stop the cooking and maintain the sprouts' vibrant color.
To toast the breadcrumbs, place in a dry skillet over medium-low heat. Cook for 2-3 minutes, while giving the pan handle a few shakes to toast the breadcrumbs evenly. Once they begin to turn golden, remove them from the heat and place in a bowl, as the heat from the pan will continue to toast them.

Meanwhile in a skillet over medium heat, sauté the garlic in the butter. Once the butter begins to bubble up and the garlic starts to jump a little, add the sprouts. Cook about 5 minutes, turning occasionally, until brown spots start to appear on the sprouts. Add the lemon juice, lemon zest, salt, and pepper. Add the toasted breadcrumbs into the skillet and toss gently. Add more breadcrumbs on top before serving; sprinkle with lemon zest if desired.

Wednesday, January 17

Citrus Crisis

Southern Californians (which now includes me) complain a lot about the weather. If you’re not within 100 mile radius of the 90201 zip code, this probably strikes you as ironic. The problem is that the weather here is always so beautiful that when it gets down to 58 degrees, the scarves and gloves come out and everyone starts grumbling about the cold. Unfortunately for many of California’s citrus farmers, the actual freezing temperatures we have experienced here lately have been truly detrimental.

At the farmers’ market this past Sunday, one farmer told us that many of her blood orange trees might not ever produce fruit because they are too young to withstand the cold. Another told us that in the nine years he has been farming, he has never seen such a prolonged cold snap. We heard several similar stories, and what struck us was how stoic these farmers were in the face of adversity. They didn’t complain or feel sorry for themselves; they simply related the depressing facts to us. Unbelievably, one farmer whose Cara Cara oranges we have mailed home to Rhode Island on many occasions was actually apologetic that his fruit wasn’t as good as last years, as if he could possibly control the weather.

When I started to express my sympathy for his misfortune, he gently rebuffed me: “Please don’t feel bad for me. This is the life of a farmer. It’s what I do.” I stopped. I didn’t know what else to say. His eyes were so sincere, his body language so sure. Instead of saying anything else, I simply tossed a few more oranges in my bag and asked him to tally me up. With a wide grin, he added, “Let me know how your family in Rhode Island likes them.” “I will,” I assured him.

Living here has allowed us to not only buy fresh produce but to also become friendly with many of the farmers. So, the concept of “buying local” resonates with us more now than ever. I can honestly say that preparing and eating the food from these wonderful people makes meals much more meaningful to us. Let’s sincerely hope that this cold weather ends soon.

Since many of the farmers told us to buy more oranges now in case their future pickings are limited, we ended up with several bags (some will stay here; some are en route to Rhode Island, as you can see).

This simple Sicilian salad is one of our favorites. I used Cara Cara oranges for this one. These super sweeties look like an ordinary naval orange on the outside, but when you slice them, they reveal a red, juicy flesh the color of a Jolly Rancher watermelon candy. Their sweetness contrasts perfectly with the salty olives and licorice flavored fennel.

SICILIAN SALAD of FENNEL, ORANGES, and OLIVES
Makes 4 servings
Print recipe only here.

2 large cara-cara oranges or naval oranges
1 fennel bulb, thinly sliced
10-12 black and green cured olives, halved (I like Kalamata and Cerignola)
A handful of fresh mint leaves
Coarse sea salt
1 Tbsp quality extra virgin olive oil*

Peel oranges, and cut into pinwheels. Arrange orange and fennel slices; drizzle with olive oil; add mint leaves and coarse salt.

*Olive Oil: My favorite olive oil is from a local olive grove, Cook and Ladder. I also like going to Italian markets where knowledgeable staff helps me with my selection. Sometimes they even offer a complimentary tasting, which itself makes the trip worthwhile.