Showing posts with label pasta. Show all posts

Thursday, December 18

Quick Italian Tuna and Olive Pasta for the Italian Feast of the Seven Fishes. Plus a Gourmet Herb Give-Away!

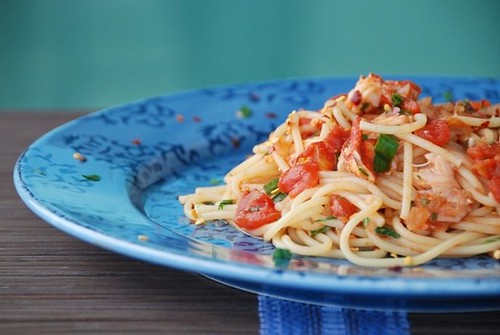
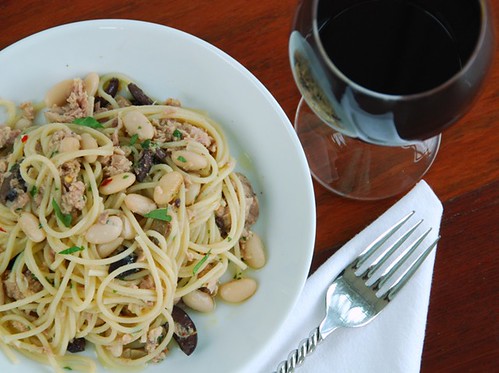
quick Italian tuna and olive pasta

When I was a kid growing up in Rhode Island, I never could understand all the fuss some families made about Christmas Day dinner. It always seemed weird to me. After all, who could eat a huge ham or turkey dinner after a gargantuan Christmas Eve feast?

Of course, when I got a little older, I realized that not everyone celebrated the Italian Feast of the Seven Fishes on Christmas Eve. I thought that was weird too.

Turns out it's not weird at all. The Italian Feast of the Seven Fishes,
is celebrated primarily among southern Italians. And Rhode Island, the state with the highest percentage of Italians, is home to many southern Italians.

This centuries-old feast celebrated on Christmas Eve has its roots in Medieval Italy and the Roman Catholic tradition of abstinence. When Catholics abstained from meat on holy days, they typically ate fish. Why seven types of fish? Historians believe it may be symbolic of Roman Catholicism's seven sacraments. Why Christmas Eve? Because Catholics would await the stroke of midnight, which was the time for the birth of the baby Jesus. That also explains why so many Italians attend midnight mass on Christmas Eve.

Of course, it's not always easy staying awake after savoring a seafood dinner of epic proportions.
Though most families enjoy classic southern Italian dishes such as fried smelts and linguine with white clam sauce, many families (like my husband's) have their own specialties, such as Gram's stuffed squid in tomato sauce.

quick Italian tuna and olive pasta

For my family it was pretty much the same every year. A first course consisted of fried smelts, fried calamari,
snail salad, and boiled shrimp cocktail.

Then came two pasta dishes such as pasta aioli (pasta made with olive oil, garlic, and pepper) and linguine with mixed seafood.

Then for the finale: baked stuffed shrimp with a side of sauteed garlicky broccoli rabe. Most of us were too full to eat the baked stuffed shrimp, since it was last course in a dinner that stretched over 4-5 hours. Plus you had to save room for cheesecake and Italian Christmas cookies, such as pizzelle, biscotti, and pignoli cookies.

When we don't make it home for Christmas Eve, Jeff and I usually make a big bowl of linguine with white clam sauce and reminisce. We just make sure there is a box of tissues nearby, since tears of laughter and sometimes sadness usually arise.


You don't have to be Italian or even celebrate Christmas to enjoy my Quick Italian Tuna and Olive Pasta. This flavorful dish is deliciously simple to make and simply delicious to eat anytime of the year.

I am delighted to send my pasta to Maryann of Finding La Dolce Vita and Joe of Italyville, who are co-hosting The Feast of the Seven Fishes.

I'm also delighted to share this dish with Giz and Psychgrad of Equal Opportunity Kitchen, the hosts of Blogger Aid: Because We Can Help. They're looking for a dish that you would feed to a hungry guest visiting your home during the holidays. Val of More Than Burnt Toast, Ivy of Kopiaste.. to Greek Hospitality and Giz of Equal Opportunity Kitchen have joined forces to create BloggerAid: Bloggers Uniting to Aid in the Alleviation of Hunger. Learn more about it here.

Finally, this pasta dish was made with Daregal Gourmet Herbs, fresh frozen herbs. No, that's not an oxymoron. Read about them here and enter for a chance to win some free herbs!

flott tuna in pure olive oil
I recommend using a top quality tuna packed in olive oil, such as Flott, which can be found in most Italian specialty markets.

Quick Italian Tuna and Olive Pasta

This fast and easy Italian tuna pasta is simple enough to become a weeknight go-to meal yet elegant enough to serve for a holiday or special dinner party. I recommend using a top quality tuna packed in olive oil, such as Flott, which can be found in most Italian specialty markets.

Makes 4 servings
Print recipe only here.

2 (5-6 oz) cans or jars of Italian tuna packed in olive oil
1/2 cup sliced olives, such as Kalamata and green Cerignola
1 1/2 cups cannelini beans, rinsed
2 teaspoons lemon juice
the zest of half of a lemon
2 tablespoons finely chopped fresh parsley*
1/2 teaspoon crushed red pepper flakes
3 tablespoons extra virgin olive oil, divided
1/2 pound spaghetti
salt, to taste

In a large bowl combine tuna with its oil, sliced olives, beans, lemon juice, lemon zest, parsley, and red pepper flakes. Then stir in 1 1/2 tablespoons of extra virgin olive oil until well combined.

Cook pasta in a large pot of boiling salted water, uncovered, until al dente. Drain in a colander and return to pot. Add the tuna mixture to the pot and toss well. Stir in remaining 1 1/2 tablespoons of olive oil until pasta is well coated. Warm until just heated through. Season with salt to taste. Serve immediately. Garnish with additional chopped fresh parsley and a drizzle of extra virgin olive oil.

*Note: In addition to parsley, I sometimes add finely chopped celery leaves.

You might also like:

Lobster Fra Diavolo


Tagliatelle with Pan-Seared Shrimp and Fennel


Save This Page on Del.icio.us
Thursday, September 18

How to Make Lobster Fra Diavolo

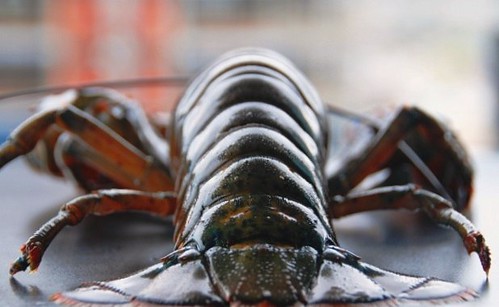
lobster back view

Lobster's back.

First there was creamy lobster risotto. Now it's Lobster Fra Diavolo, a treasured Italian-American dish characterized by a spicy sauce for pasta or seafood. Fra Diavolo, was the king of pasta in the 1990's. (I know this because it was Jeff's favorite entree to order at a "nice" restaurant when we were dating.)

The last time Jeff ate lobster fra diavolo, Whitney Houston's "I Will Always Love You" was a number one hit. Though Jeff will always love lobster fra diavolo, he doesn't feel similarly toward Whitney, so I decided not to invite her to our lobster dinner. I asked Frank, our oldest and dearest crooner, to come instead, because Italian food always tastes better with ol' blue eyes.

lobster fra right 2

Lobster Fra Diavolo
Serves 2
Print recipe only here.

1 (1.25 pound) live lobster
2 teaspoons olive oil
2 shallots, diced
1 (14.5 ounce) can diced or crushed tomatoes, preferably San Marzano
1/2 cup dry white wine
1 teaspoon dried crushed red pepper flakes
2 teaspoons fresh oregano, chopped
1 tablespoon fresh Italian parsley, chopped
1 tablespoon fresh basil leaves, chopped
salt, to taste
1/4 pound spaghetti

Bring a large pot (big enough to submerge the lobster completely) of salted water to a boil. To kill the lobster, hold a butcher knife over its head, about an inch behind its eyes; puncture and slice forward in one motion. Plunge the lobster head first into the boiling water for 7-8 minutes. The shell should be bright red, though the meat will finish cooking in the risotto. Remove the lobster from the pot, rinse, and allow to cool.

To remove the meat, twist off the claws; crack them open with nut crackers, and extract the meat. Bend the lobster's body back from the tail until it cracks; remove it. Then push the tail meat out. Crack the lobster body open and break off the legs; use a skewer to push the meat out of the legs.

To make the sauce, heat olive oil in a large skillet over medium-high heat. Add the shallots and saute for 3-5 minutes, or until translucent. Add the tomatoes with their juices, wine and crushed red pepper. Simmer until the sauce thickens slightly, about 8-10 minutes.

Meanwhile cook spaghetti in salted water for 10 minutes, or until al dente, fully cooked yet firm to the bite.

Add the lobster meat to the sauce and toss well. Heat through 1-2 minutes. Add the cooked pasta to the pan and toss well. Turn off heat. Stir in the fresh herbs and season with salt. Garnish with additional fresh herbs and serve immediately.

You might also like:

Grilled Lobster (there's a video!)


Individual Pesto Lasagnas


Penne with Fresh Ricotta and Baby Heirloom Tomatoes


Penne with Italian-American "Gravy," Meatballs, and Sausage


Hey! Today is the last day to enter for your chance to win FREE Kona Kampachi fish from Hawaii!
Click
here for details.


Save This Page on Del.icio.us

Sunday, August 10

Penne with Fresh Ricotta and Baby Heirloom Tomatoes

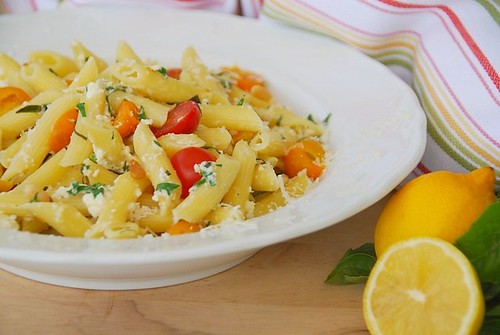
baby heirloom tomato penne lemon

If the farmers' market were giving out superlatives, heirloom tomatoes would get "most popular." No contest. Today there were several different farmers selling them from $5-7 per pound, and each table had a line of people at least four deep waiting to buy some.

Considering that one tomato weighs about half a pound or more, you could be in for a real sticker shock if you buy 3 or 4 of them! People don't seem to mind though; probably because after years of eating tasteless, hard, dry supermarket tomatoes, it's worth paying a little more to get heirlooms that taste as exciting as they look.

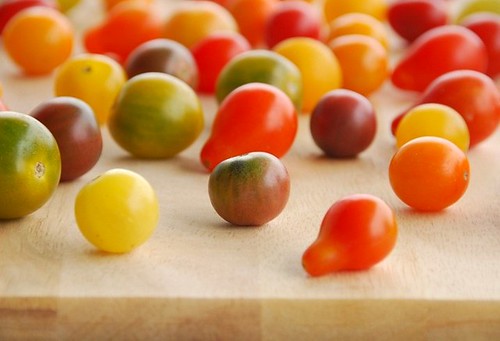
baby heirloom tomatoes

Who can resist brilliantly colored, endearingly odd-ball shaped tomatoes with whimsical names such as Big Rainbow, Green Zebra, and Brandywine? If, however, you don't want to break a $20 just to try a tomato, then consider baby heirlooms instead. These diminutive members of the heirloom tomato family come in a dazzling kaleidoscope of colors. Unlike their larger brethren, however, they tend to be neatly round, oval, or teardrop in shape. Most baby heirlooms are the size of cherry tomatoes, though once in a while, you'll find one the size of a golf ball.

baby heirloom tomatoes and basil
(baby heirloom tomatoes with their best friend, basil)

Baby heirloom tomatoes give you the experience of eating an heirloom tomato but at a fraction of the cost. Plus they're just the right size to pop into your mouth as you pass them on your kitchen counter.

Where can you find baby heirloom tomatoes? Though farmers' markets and specialty markets are the most reliable, they're actually starting to show up at many traditional supermarkets as well. Trader Joe's sells them for about $2.50 a container (now, that's a bargain).

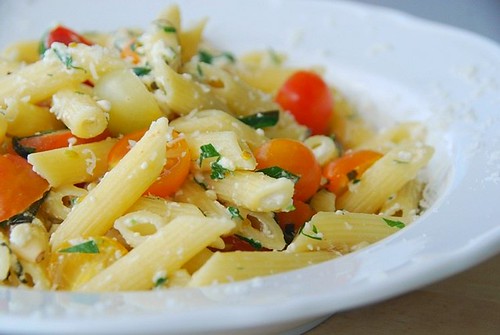
Though petite, baby heirloom tomatoes are bursting with big tomato flavor, which you'll savor in this perfect-for-summertime, easy dinner: Penne with Fresh Ricotta and Baby Heirloom Tomatoes. Fresh ricotta cheese adds silky creaminess, while tangy lemon and aromatic fresh herbs enhance the tomatoes' flavor.

baby heirloom tomato pasta close up

Penne with Fresh Ricotta and Baby Heirloom Tomatoes

Serves 4
Print recipe only here.

8 ounces penne
1 cup baby heirloom tomatoes halved**
1/4 cup mixed fresh herbs, such as basil, chives, parsley, and tarragon
1/4 teaspoon lemon zest
1/2 teaspoon lemon juice
salt, to taste
7-8 cranks of freshly ground black pepper
1/4 cup whole milk ricotta cheese
1/4 cup grated Parmiagiano-Reggiano cheese, plus extra for garnish
1 tablespoon toasted pine nuts


In a medium bowl, combine tomatoes, herbs, lemon zest and juice, and salt & pepper. Set aside.

Cook pasta in salted water according to directions, being sure to keep it al dente (cooked through yet firm). Drain and return to pot. Stir in the ricotta cheese until pasta is evenly coated. Stir in grated Parmiagiano-Reggiano. Add the marinated tomatoes, and toss until just combined. Sprinkle with toasted pine nuts and some extra grated cheese, and serve immediately.

**If you are unable to find baby heirloom tomatoes, then cherry or grape tomatoes make a good substitute.

Since these babies aren't your everyday tomato, I'm sending them to Marija of Palachinka, this week's host of the ever-popular Weekend Herb Blogging, created by Kalyn of Kalyn's Kitchen.


You might also like:

Roasted Rainbow Carrots with Chives and Thyme


Baby Artichoke and Asparagus Risotto


Grilled Shrimp and Avocado Salad


Wild Rocket (Wild Arugula) Pasta


Save This Page on Del.icio.us
Sunday, March 23

Creamy Goat Cheese and Beet Green Pasta

creamy goat cheese and beet green pasta

A few weeks ago at the farmers' market I asked for a bunch of beets. The farmer grabbed a beautiful bunch: five crimson colored globes topped with remarkably long, red stalks and large, crisp leafy greens. I could practically taste them.

Then right in front of my eyes, before I could utter a word, he beheaded my beautiful beets and flung the greens into a dirty cardboard box with other sad, misfit vegetables.

"What are you doing?" I asked.

"What? You didn't want them did you?" he asked, incredulous.

Didn't want them?
! The beet greens are the best part.

It made me miss Carlos, the farmer from whom I bought beets all last year when we lived in LA. One Sunday when Carlos saw me coming, he ran from the table into the back of his van. He motioned me to follow him. When I reached the back of the van, he uncovered a big box full of fresh bunches of beet greens and flashed me a smile. "For me?" I asked. "For you, Miss."

I actually got a little welled up. In the midst of a bustling market, he thought to save me the beet greens and was less concerned with making extra money off of them than of making me happy.

Though no one could ever replace kind-hearted Carlos, I've met a new, super nice farmer, Sam. The first time I bought beets from Sam, I commented on how beautiful the beets greens were; he asked, "Would you like some more?"

"Really, are you sure you don't want them?" I asked.

"Yeah, you can have them," he said.

Imagine. Giving beet greens away. What is the world coming to?

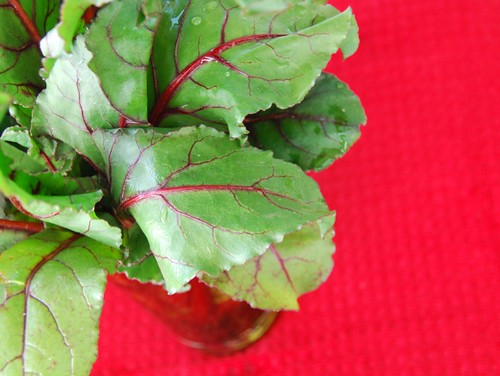
beets greens on the red carpet

If you've never cooked with beet greens, then you're in for a treat. They taste similar to Swiss chard (slightly earthy and nutty) and are a delicious alternative to spinach. Though they can be eaten raw in salads, I prefer them cooked, which softens their texture and draws out their flavor.

Beet greens are true health food: One cup of cooked beets greens is only 39 calories and provides 220% (that's not a typo) of your daily vitamin A (for healthy eyes, cells, skin, and hair) and 60% of your daily vitamin C (a health-promoting antioxidant). It's also full of other nutritious vitamins and minerals. See below for tips on selecting, storing, and cooking with beet greens.

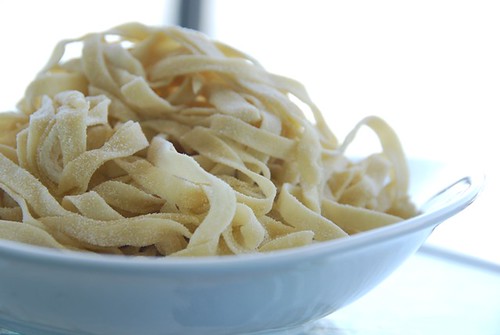
ahh...fresh fettucine

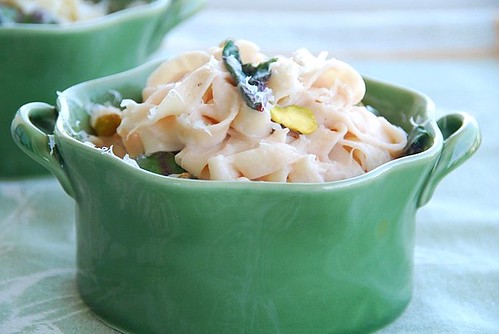
Though you can use any type of pasta you prefer for this creamy goat cheese and beet green pasta, I bought freshly made fettucine from Assenti's Pasta here in Little Italy. With so few ingredients in this dish, the light and chewy fresh pasta really stands out. It bears little resemblance to the dried boxed variety. Plus the creamy goat cheese sauce clings deliciously to it as you twirl it on your fork.

Creamy Goat Cheese and Beet Green Pasta

Serves 4
Print recipe only here.

1 tablespoon plus 1 teaspoon olive oil
6 cups washed and sliced beet greens

1/2 pound fettucine (or other noodle)

1/2 cup heavy cream or half n' half
4 ounces goat cheese
1/4 teaspoon fresh thyme
salt and freshly ground black pepper, to taste
2 tablespoons pistachios
1/2 cup grated Parmesan or Asiago cheese

To prepare the beet greens, cut off the thick stalks. Submerge greens in a large bowl of cool water to remove dirt. Drain, rinse thoroughly, and pat dry. Remove any tough inner stalks of the beet green leaves, then slice cross-wise into thin strips. Set aside.

In a deep, heavy pot, cook pasta in salted water according to directions, preferably al dente. If using fresh, it should cook within 3-5 minutes.

In a large skillet, warm olive oil over medium heat. Add sliced beet greens, until wilted, about 2-3 minutes. In a small bowl, whisk the cream and goat cheese until well blended. Add to the skillet, and reduce heat to medium-low. Cook for 3-4 minutes, or until sauce begins to thicken slightly. Add fresh thyme, and season with salt and pepper. Add the cooked pasta to the skillet and toss until well coated. Divide among two plates; top with pistachios and extra grated cheese. Serve immediately.

Serving Suggestion-- This pasta pairs well with spicy and fruity salads, such as:
Selecting and Storing Beet Greens:
  • Look for unwilted, green leaves with bright red spines. If they're shriveled or full of holes, then skip 'em.
  • To prepare beet greens, cut off the thick stalks. Submerge greens in a large bowl of cool water to remove dirt. Drain, rinse thoroughly, and pat dry. Remove any tough inner stalks of the beet green leaves. Wrap loosely in paper towel and place in a Ziploc bag or an air-tight plastic container. They should last 2-3 days in the refrigerator this way. You can also remove the beet greens and store them unwashed in the refrigerator for up to 4-5 days, assuming they weren't too old when you purchased them.
  • If you aren't going to use your beet greens right away, then clean them as usual and par-boil them by dropping them in boiling water for about 1 minute; remove and plunge into a bowl of ice water. Shocking the greens will keep them bright and beautiful. Drain, and store in an air-tight container in the fridge for up to 3-4 days.

Other delicious ways to enjoy beets greens:
  • Thinly sliced and added raw to salads
  • Sauteed in olive oil and garlic, and placed on crostini with goat or blue cheese
  • Added to vegetable soups and stews
  • Added to frittatas with cheese such as ricotta, Parmesan, or goat
  • Simply sauteed in olive oil and garlic, then topped with raisins and toasted pine nuts
  • Creamed with milk or heavy cream, butter, flour, and nutmeg
I hope Ramona of The Houndstooth Gourmet likes beet greens because I'm sending this pasta dish to her. She's hosting Weekend Herb Blogging created by Kalyn of Kalyn's Kitchen.

You might also like these pasta dishes:


Save This Page on Del.icio.us

Monday, December 3

Sweet Potato Gnocchi and Home Sweet Home

The following are yesterday's verbatim forecasts from weather underground for two cities where I have lived. I still live in one. Can you guess which?

A. Freezing rain...sleet and periods of freezing drizzle...then rain...freezing rain...snow and freezing drizzle with possible sleet. Precipitation may be heavy at times. Snow and sleet accumulation around an inch. Lows in the mid 20s. Temperature rising into the mid 30s. Northeast winds around 5 mph...increasing to 10 to 20 mph. Chance of precipitation near 100 percent.

B. Sunny. High 73. Light winds.

I'll give you a hint. It's not A.

How do you decide where to live? Is it the weather? The quality of the public schools? Or is it based on the proximity to her mother's house? (Or for him, the distance from her mother's house?) Jeff and I have sacrificed things to live here in San Diego -- primarily family and finances. It sometimes seems like the right choice, and other times, not.

Take this weekend for example. We have all heard ad nauseam how the housing market is tanking. However, when Jeff and I talked to some realtors in San Diego, we learned that there are "micro-markets which are exempt from the decline."

Beautiful. 3.5 million square miles of dropping real estate in the US, and Jeff and I picked the 40 square feet where prices are still going up.

Unlike Jeff and me, Peabody's house hunting days are over. She and her husband have a lovely new home, and to celebrate, Peabody is hosting a housewarming party. I'm bringing her homemade Sweet Potato Gnocchi with Maple Cinnamon Sage Brown Butter. I know, that's the longest name ever, but it's not mine, it's Giada's.

When my parents were here for Thanksgiving, they gushed so much about Giada's sweet potato gnocchi that I surprised my dad and made them for his birthday. Honestly, they were delicious. Made with baked sweet potatoes and creamy fresh ricotta cheese, these gnocchi are pillowy and comforting. I especially love the way the fragrant, sweet, maple sauce clings to the grooves.

Here is Giada's recipe for Sweet Potato Gnocchi from her show Everyday Italian on the Food Network. For a copy of the recipe only, click here. I made the following changes:

  • I substituted Garnet yams for sweet potatoes.
  • I used pretty purple sage instead of green.
  • I used about half the butter Giada called for, but that's up to you.
  • I added toasted pecans on top because what's maple syrup without pecans?
See these posts for nice step-by-step photos on how to hand-make gnocchi.

Elise's guide for Potato Gnocchi
Coothink's guide for Sweet Potato Gnocchi with Gorgonzola
Bea's guide for Potato Gnocchi with Sauteed Mushrooms

I also like:
Simona's post and article about gnocchi
Katie's recipe for Pumpkin Gnocchi
Chow's recipe for Chestnut Gnocchi with Robiola Cheese Sauce
By the way, thank you Andrew of Spittoon for taking the time to add my Eat Christmas Cookies event to IMBB. I've put in a good word to Santa for you.

Save This Page on Del.icio.us

Thursday, September 6

Pesto Lasagna for One, Tomatoes for a Small Army


Jeff and I bought our first house when he started medical school in North Carolina. It was a charming 1930’s bungalow with a huge backyard. We had just moved in and were surveying our lot one early morning when Jeff said: “You know what, we’ve gotta plant a garden.”

“A garden? We don’t know the first thing about gardening,” I said.

“How hard can it be?” he asked.

Then I thought, Yeah, our grandparents did it. How hard could it be?

The next day we carefully mapped it out and headed to the local nursery. When we came to the tomato plants, we didn't know how many to buy. I thought 6 would be enough, Jeff thought 24; we planted 24. (“They’re cheap,” he said, “just buy them.”)

On a hot and sticky Saturday just before he started classes, we dug up our yard and planted our first garden. While we were out there, our next door neighbor, Bill, walked over to say hello. He was an imposingly tall fellow with thick glasses that fogged up in the humidity. A native North Carolinian, he had a thriving garden and a wonderful drawl. He stopped a couple of feet away from us and stared at our tomato plants.

“Hey, Bill. How ya doin’?” Jeff asked.

“Them’s an awful lot of ‘maters,” he said, “You sure you want all them plants?”

“Yeah, sure. We’ve got room for them.” Jeff replied.

“They’s gonna get big, ya know,” he responded.

“Oh. Well, maybe I’ll spread them out more,” Jeff said.

“All right. But them’s an awful lot of ‘maters,” he said, heading back to his textbook-perfect garden, replete with small tractor.

We cared for our tomato plants like they were our children. We watered them with Miracle Grow and weeded their beds, and to our delight, they grew. As the weeks passed, Jeff spent more and more time in gross anatomy, and I spent more and more time in the garden. By the fall, we had a grove of tomato plants so thick and high you could’ve cut a maze through it like it was a corn field. And I had so many mosquito bites that I had to start taking iron for anemia.

In case you’re wondering, 24 tomatoes plants produce an obscene number of tomatoes. We ate (and gave away and froze and roasted and pureed) scads of tomatoes.

I don’t know if it was something in that soil, the Miracle Grow, or the dense heat and humidity, but most everything (especially herbs) in that garden grew beyond our imagination. Our rosemary plant turned into a bush and the basil was fully 4 ½ feet tall. I also started making pesto that summer, enough pesto for the entire winter and entire spring.

I was craving a basic basil pesto last week and made this lasagna, my go-to tomato and basil dish. Made with fresh pasta sheets, grilled eggplant, and fresh tomato sauce, it is savory yet lighter than traditional lasagna, perfect for early fall.

Though more time-consuming than most of my recipes, this dish is worth it. In fact, you can even prepare the lasagnas a day ahead and pop them in the oven for dinner the next night.

A couple of tips about making and freezing pesto:
I prefer to slightly saute the garlic and toast the pine nuts before adding them to the pesto, which imparts a mellower savory flavor.

Also, when I first tried freezing pesto years ago, it would turn a muddy brown, until Jeff told me to cover the top of it with olive oil to stop the oxidation process. See, medical school does come in handy sometimes.


Individual Pesto Lasagnas
Makes 4 servings
Print recipe only here.

Basil Pesto
1 tsp olive oil
2 garlic cloves, coarsely chopped
2 Tbsp toasted pine nuts
2 cups firmly packed basil leaves
¼ cup grated Parmesan cheese
3 Tbsp warm water
3 Tbsp extra virgin olive oil
Salt and a couple of shakes of crushed red pepper

Quick Fresh Tomato Sauce
2 tsp olive oil
1 large shallot, thinly sliced
3 cups de-seeded diced fresh tomatoes
Salt and several shakes of crushed red pepper flakes

A note about the lasagna ingredients: How much pasta you use will depend on the type of pasta sheets you buy. I used 2 sheets per person, which was about ¾ of pound of pasta in total. So, adjust measurements of the following fillings to match the size of your pasta sheets. Also, if you can’t find sheets, then you can use traditional long lasagna ribbons and roll them up for individual servings.

8 sheets of fresh pasta
1 cup fresh ricotta cheese
About ½ pesto (from above recipe)
1 medium sized eggplant, cut into 8 slices
Some olive oil, for brushing the eggplant
16 sun-dried tomatoes, rehydrated (oil-packed are fine too)
1 cup fresh baby spinach leaves
½ cup grated Parmesan cheese for garnish


To make pesto:
Heat 1 tsp olive oil in a small skillet over low heat. Add garlic, and heat through until slightly golden (about 2-3 minutes). Add to food processor.

In same pan, add pinenuts, and toast 1-2 minutes, until golden; add to food processor.

Add basil leaves, cheese, water, salt and pepper to food processor. Pour olive oil though processor chute (or add to with other ingredients if unable), and process until smooth.

If you’re not going to use your pesto immediately, then pour in a small sealable container and cover with a layer of olive oil. This will prevent the pesto from turning brown.

To make tomato sauce:
Heat olive oil in a medium skillet over medium heat. Add shallot, and sauté until slightly browned, 2-3 minutes. Add tomatoes, and cook for 5-7 minutes minutes, until they start to break down. Season well with salt and crushed red pepper. Remove from heat and set aside.

To assemble lasagna:
Now that you’ve got the pesto and the sauce made, it’s time to make the lasagna. Preheat your broiler for the eggplant and bring a wide, shallow pan of salted water to a boil. Slice eggplant into 1/8 inch rounds and place on a lined baking sheet; brush both sides with some olive, and sprinkle with salt. Broil for 5-6 minutes, turn over once, and broil for another 5-6 minutes, or until slightly charred and softened.

By this point, your water should be boiling. Add 1 pasta sheet at a time to the boiling water. Cook for about 1-1 ½ minutes, flipping once with a pair of tongs. When cooked, remove to a large lined baking sheet to assemble individual lasagnas. Having all of your ingredients lined up will make the assembly much quicker.

Here’s how I do it: Start with one sheet of cooked pasta; spread some ricotta cheese over the surface; spread some pesto on top of the cheese. Add two slices of eggplant, then 4 sun-dried tomatoes, and a few fresh spinach leaves. Top with another cooked pasta sheet. Continue until you complete all four. (If you’re planning ahead, then cover and refrigerate the lasagnas at this point.) Otherwise, place under the broiler for about 3-5 minutes, or until the pasta starts to become slightly bubbly and crispy. Remove from oven and using a large spatula, CAREFULLY place onto plates. Top with some fresh tomato sauce and grated Parmesan cheese. Enjoy!

You might also like:
Of Yankees and Yams
Bring Back Sunday Dinner
Wild Arugula Pasta
Broccolini and Sun-Dried Tomato Calzones


Here are some other delicious pesto dishes I have come across:
Susan's Tomato Pesto Pizza
Heidi's Pesto
Elise's Asparagus Pesto with Pasta
Chris's Spinach Fettucine with Spinach Pesto
Joey's Gnocchi with Rocket Pesto

Save This Page on Del.icio.us

Friday, July 13

Wild Arugula is Hot, Iceberg is Not


I've never really been one for following the latest trend. Although I just HAD to have a pair of GUESS jeans in the eighth grade (which, thankfully, my mom bought for me, allowing me to survive junior high with minimal permanent damage to my self esteem).

Like clothing, food can be fashionable. For example, last year was apparently the year of the pomegranate. From POM juice to pomegranate molasses, suddenly everybody had to have pomegranate. I still remember my mom's mystification at this craze: "We've been eating pomegranates for as long as I can remember. And now they want to charge an arm and a leg for them because they have antioxidants."

I think a similar infatuation with unusual salad greens has taken hold. Gone are the days of iceberg; now it's chic to eat hip greens like Mache or wild arugula. I grew up eating arugula because we grew it in our garden; therefore, I never considered it special. It was just that spicy lettuce we added to our salads in summertime. Yet, over the last few years arugula, along with the wild and baby arugula varieties, have become hot. It’s been featured in numerous cooking magazines, and many chefs laud its uses in everything from salads to pasta dishes and pizzas.

So, what's so "wild" about wild arugula? It's a slightly darker shade of green than regular arugula, has delicate fluted leaves, and packs a more intense flavor. Most chefs suggest eating wild arugula raw or just wilted to truly appreciate its flavor.

Eating freshly picked wild arugula is quite a sensory experience. First, you detect a spicy fragrance. Then, when you place a leaf in your mouth, you taste the slightest bitterness and heat. It's when you bite it though that things really get fun: it releases an explosion of flavor that can be best described as pungent or peppery. It’s no wonder that most Europeans call it rocket (from the German Rauke).

We don't call it rocket in The States apparently because the Italians who immigrated to America called it rucola, which became Americanized as arugula. Indeed, arugula is typically associated with Italian cuisine, as it has been cultivated in that area since Roman antiquity.

The best part about cooking with wild arugula, however, is the praise you will receive from your guests. Whenever I have company, I almost always make Jamie Oliver’s wild rocket pasta. Like everything Jamie cooks, it's delightfully easy to make and delicious to savor. In fact, both my mom and brother-in-law Jason have requested that I post about Jamie’s wild rocket pasta, so here it is.

Wild arugula is most commonly found at farmers' markets and speciality organic markets. If it's not available to you and you've got a green thumb, you can grow some pretty easily. It likes cooler temps and apparently thrives in the Midwest region of the country. If all else fails, then use regular arugula; I promise that it will still be flavorful. Just be sure to use all of the freshest ingredients you can find for this pasta, and it will shine. Oh, and by the way, arugula is also high in antioxidants, so I guess you can expect to start paying a lot more for it; sorry Mom.

This is my submission for this week's Weekend Herb Blogging, the fantastically successful food blogging event created by the talented Kalyn of Kalyn's Kitchen, and hosted by me.


Wild Rocket (Wild Arugula) Pasta

The measurements may not be exactly the same as Jamie's, but I know he wouldn't mind, since he's all about a "handful of this" and a "dollop of that." So, adjust the amounts below to satisfy your taste. Also, simply omit the anchovies for a vegetarian version. I can attest that it's fabulous without them too.

Print recipe only here.

2 garlic cloves, finely chopped
1 Tbsp olive oil
2 small cans of anchovies packed in olive oil
1-2 whole chilies, finely chopped (or as much heat as you can take!)
3 handfuls of wild arugula (or regular)
The zest and juice of 2 small lemons (or less if that is too tart for you)

8 ounces fettucine or thick spaghetti
About ¼ cup grated Parmesan cheese
Additional wild arugula to add on top
2-3 Tbsp extra-virgin olive oil for drizzling

While the pasta is cooking, prepare the wild arugula. Sauté the garlic in olive oil over medium heat. Just as it begins to turn golden, add the chili and anchovies. Lower the heat, and gently give it a couple of stirs. After a couple of minutes, the anchovies will start to melt; add the wild arugula, lemon juice and lemon zest at this point. Stir a couple of times, then turn off heat, so the arugula wilts but does not cook.

Once the pasta is cooked, add it to the pan with the arugula and toss. Add the Parmesan cheese, and toss to coat.

Divide the pasta among 4 plates; top each with a little more wild arugula, some good Parmesan cheese, and a drizzle of extra virgin olive oil.

Await praise from your guests!


Do you like the darling tomato pictured above? Her name is Blush, and I'd like to thank my friend Alanna for creating her to promote farmers' markets.


Save This Page on Del.icio.us

Thursday, June 28

A Pea Pasta Fit for a Princess


My mom says I have expensive taste. You wouldn’t know it by the stores I go to, such as Marshall’s and Loehmann's. Yet, when it comes to eating, I like high quality foods and am more than willing to splurge.

That’s why I didn’t hesitate to buy saffron. Well, that’s not really true. I did hesitate. Not because of the price; because I have an uneasy relationship with saffron. It’s sort of like kissing someone, and the "wow" factor just isn’t there. You know, he’s a nice guy, but there aren’t any fireworks. So, you give him another try, and it’s great. Then the next time it's only so-so. You know what I mean? That’s been my experience with saffron. (Not with guys; Jeff has always been a great kisser).

I’m unequivocal when it comes to food -- when I don't like something, I don't usually try it again. Which is why I’m surprised about my willingness to give saffron another chance. When I first tasted it in a great Indian restaurant, I found its floral overtones unpalatable. I thought I would be put off saffron forever after that. However, another delicious Indian restaurant redeemed saffron for me by serving it in a lovely rice and pea dish. Since then, I've had it in Spanish and Middle Eastern dishes and have begun cooking with it (to mixed results). Yet, the recipe I share today is a keeper. And coming from me, that is high praise.

Given my ambivalence toward saffron, I decided to do a little research. Saffron has been cultivated for over 3000-4000 years. It is used throughout the world, most notably in Asian, Indian, Arab, Spanish, and Moroccan cuisines and can be found in both savory and sweet dishes as well as drinks.


Saffron is extraordinarily expensive at $1000 a pound. (No, I didn’t make a mistake with the zeros). Why so pricey? Because saffron is manually picked from the stigmas of the crocus flower. It is incredibly labor and time intensive, as a result. Additionally, it takes a football field’s worth of saffron threads to make just 1 pound! Fortunately, only a tiny amount is needed for most recipes, so you don’t need a second mortgage on your house to cook with it.

Most chefs and home cooks alike recommend using saffron threads instead of powder to ensure that you are receiving true saffron and superior flavor. The threads should be soaked in water prior to using in the recipe, and suggested soaking times range from 20 minutes to several hours. I soaked mine for 2 hours (see recipe).

In this recipe, the saffron was fragrant (not overpoweringly so) and slightly smoky. I loved it in the creamy sauce, which was satisfying yet not too rich. For a vegetarian version, simply omit the shrimp, which is how I ate it.

I also recommend using fresh English peas (see my pea primer for more). Just look at these perfectly round, shiny peas nestled together. They are sweet-natured and delicate and should be treated with care. That’s why I add them at the end of the cooking process. The heat from the sauce cooks them enough; overcooking peas not only makes them mushy but also depletes them of their nutrients, including Vitamins C and K.

I am submitting this post to Kalyn of Kalyn's Kitchen, the founder of the ever-popular Weekend Herb Blogging. Incidently, I am pleased to announce that I will be hosting Weekend Herb Blogging here July 9-15.


Pasta Shells in Creamy Saffron Sauce with Shrimp and Fresh Peas
Print recipe only here.

8 ounces pasta shells
1 tsp saffron threads
3 tsp water
2 shallots, thinly sliced
2 Tbsp butter
2 cups milk (whole or low-fat)
2 Tbsp flour
2 Tbsp dry white wine
2 cups fresh shelled English peas
Salt and pepper, to taste

2-3 Tbsp olive oil
24-28 extra large or jumbo shrimp

Cook pasta in salted water according to instructions.

Place 1 tsp saffron threads in a small bowl with 3 tsp water, and let rest for a minimum of 2 hours; the threads will swell in size. If you don’t have the time, then use this quick soak method. When you are ready to add the saffron to the sauce, just drain the water, but don’t crush the threads. Since saffron is intensely flavored, I suggest adding just a few threads at time and tasting as you go until you get the desired amount.

In a medium saucepan, over medium heat, melt butter. Add shallots, and sauté 2-3 minutes, or until softened. Add milk and flour, and stir until well combined and sauce begins to thicken and bubble. (I used low-fat milk, but whole milk’s added fat would make an even creamier consistency). Add white wine and a pinch of the prepared saffron threads. Add the fresh shelled peas to the sauce, and cook for 1-2 minutes. Season generously with salt and pepper.

Heat olive oil in a large skillet over medium-high heat. Add the shrimp, and sauté for 5-7 minutes, turning to ensure that they brown evenly on both sides.

Add the cooked pasta and shrimp to the saffron sauce, and toss well to coat. Gently heat through, and serve immediately. Makes 4 servings.

BTW-I just found a delicious sweet saffron pilaf dish that Kate made over at Kate in the Kitchen.
Save This Page on Del.icio.us
Friday, April 27

Bring Back Sunday Dinner


Hey, come over here, kid, learn something. You never know, you might have to cook for twenty guys someday. You see, you start out with a little bit of oil. Then you fry some garlic. Then you throw in some tomatoes, tomato paste, you fry it; ya make sure it doesn't stick. You get it to a boil; you shove in all your sausage and your meatballs; heh?... And a little bit o' wine. An' a little bit o' sugar, and that's my trick.
-Clemenza teaching Michael to cook. The Godfather, Part I.

When Jeff and I were dating, we would on occasion deliver papers for his family’s Sunday morning paper route. I distinctly remember his mother’s detailed descriptions of whose paper went where: Mr. Lisi, the front door, Ms. Vitale, the side door, the Di Fusco’s, the front door if the screen was open but the back if it was locked. I also distinctly remember the smell that hit you when you walked up each of the little driveways early in the morning and opened the screen doors. Not coffee, not maple syrup, not bacon and eggs, but gravy.


Many Italian-Americans on the East Coast refer to tomato sauce that is cooked with meat (pork and/or beef) as “gravy.” To make it correctly takes hours, and where we grew up, every Italian-American woman with any pride started the gravy at breakfast to be ready for 2:00 Sunday dinner.

Though every family had variations, the basic premise was the same: braise cuts of pork (sausages or other cuts from the butcher) in garlic and olive oil. Make a sauce from fresh or canned tomatoes. Then make a huge batch of meatballs to be added to the gravy. Last, make the pasta, which was always cavatelli. Cavatelli (pronounced cah-va-ti or cah-va-tel by most Rhode Islanders) was never a mid-week pasta, maybe because it never made as much as other types of pasta, like spaghetti, and because it was more expensive. Add some chicken (on the side), salad, a loaf of crusty Italian bread, and some red wine (just from a screw top gallon or in my parents’ generation, homemade wine), and Sunday dinner was complete.

It was exactly the same every Sunday, (save for a few radical variations like raisins in the meatballs or prunes in the gravy in the 80’s) yet we always looked forward to it. My mother, like her mother before her, managed to make a hearty meal for the whole family without blowing the weekly budget. From the time my hands were big enough to roll the meatballs, it became my contribution. Standing in the kitchen for hours with my mom never seemed like a chore to me; we talked and laughed the entire time I rolled the meatballs, without regard to my cold, wrinkled fingers. There was never a recipe--you just knew how they should look, feel, and smell.

The amazing thing is long before we knew each other, 6 miles away at Jeff’s house, at that very same moment on Sunday mornings, his mother and grandmother would be in their kitchen cooking the gravy and rolling the meatballs. Jeff’s contribution at his house was periodically dunking the bread in the gravy. Who could blame him? Everyone knows that’s the best part.


Sadly, I can’t imagine cooking these Sunday dinners today; it seems old-fashioned. Instead, we quickly cook some tomatoes on the stove top, add some fresh basil, and we're done. Who’s got 6 hours to make the Sunday dinner? Most of us are too busy; today we are a “30-minute-meal” society. But then I think, weren’t our mothers busy too? How did they do it?

I sometimes wonder if I would have preferred to have been born in my parents’ generation; my mother tells me I romanticize this. Yet, there is something comforting about the predictability of a ritual like making the gravy on Sundays. In fact, Jeff and I have lived away from home for about 10 years, and while we love our independence, we still reminisce about Sunday dinners. It’s not just the food we miss, but the people. The way no one would dare eat until my grandmother was situated at the table. The way Jeff’s grandfather would always be the last to finish – usually after the dishes were already cleared. I remember the kitchen windows steaming up from the simmering gravy as I stood next to my mother talking and rolling and stirring. Even though I haven’t made a meatball in close to 20 years, I still remember exactly how to do it.

This past Sunday, I rolled up my sleeves and rolled out some meatballs. Starting early (well, after the gym anyway) Jeff and I made Sunday dinner for two. The sound of the wooden spoon banging on the pot to shake off the gravy, the site of bits of red tomato splattered on the white stove, and the smell of frying meatballs brought us right back. If only we could have everyone over.

Did you (or do you still) have a Sunday dinner tradition?

The lovley Bee from Jugalbandi generously asked me to contribute to her Postcard Series, a collection of posts of cultural snapshots from around the world. Read more postcards here.


Italian-American Gravy
Print recipe only here.

2 Tbsp olive oil, divided
4 sweet Italian sausage links
3 (28-ounce) cans of San Marzano tomatoes
1 large onion
2 whole garlic cloves
3/4 cup red wine
1 tsp crushed red pepper
Salt, to taste
7-8 fresh basil leaves, thinly sliced

Meatballs:
1 pound of ground beef (I used lean)
1 cup breadcrumbs
1/3 cup grated Parmigiano-Reggiano cheese
¼ cup chopped fresh flat-leaf parsley
1 large egg, lightly beaten
Salt and black pepper, to taste
1/8 cup olive oil
1/8 cup canola oil

1 pound of pasta
1/2 cup grated Parmigiano-Reggiano cheese

Gravy:
In a large heavy pot over medium-low heat, warm 1 Tbsp olive oil and add sausages. Cook about 4-5 minutes on each side, or until browned all over; remove from heat.

Pour the San Marzano tomatoes in a large bowl, and crush them with your hands (or use a food mill if you prefer).

Heat the second Tbsp of olive oil in the same deep pot; add garlic cloves and saute for about 2 minutes, or until golden brown. Remove and discard garlic. Pour in the tomatoes (with their juice), red wine, crushed red pepper, and salt. Bring to a boil; reduce to a simmer, for about 35-45 minutes, stirring occasionally.

Meatballs:
Find your mother or daughter or other suitable companion, then...


Place the meat in a large bowl. Add the breadcrumbs, cheese, and parsley. In a small bowl, beat the egg with some salt and pepper; add to the meat mixture. Mix the ingredients with your hands until the consistency is moist and the meat holds together well. If it’s too dry, add some water or another beaten egg. If it's too moist, add more breadcrumbs. Once the consistency is right, using your hands, roll the meatballs into 1 ½ inch balls. It should make about 22-24 meatballs.

Mix the olive and canola oils in a large skillet over medium heat. Fit as many meatballs in the skillet as you can without overcrowding so you have room to turn them. Cook about 2-3 minutes until browned, then turn over and cook another 2-3 minutes, until all sides are evenly browned. Place on a paper towel-lined plate to absorb any excess oil. Repeat as necessary.

The meatballs can also be baked if you prefer not to fry them. To bake them, preheat the oven to 400 degrees F. Place meatballs on a tinfoil-lined baking sheet (for easy clean up) and cook for 20 minutes, or until browned.

Add the cooked meatballs and sausage to the gravy after it has simmered for about an hour. Simmer for an additional 60 minutes (or up to several hours if you want to be authentic). If the gravy becomes too thick, simply add small amounts of water or water mixed with a bit more red wine.

In the meantime, cook pasta in salted water according to the directions until al dente. Once cooked, add the gravy, top with meatballs and sliced sausages, and sprinkle with grated Parmigiano-Reggiano and fresh basil.


"Hey, I can't eat this crap. Bring me some pasta with gravy and meatballs.”
-Paulie Walnuts to Italian waiter after being served a plate of seafood pasta while visiting Italy. The Sopranos.


Save This Page on Del.icio.us